[LANCER] The Rohirrim
Created by rawrness13 on Jun 7th 2017 (Last Updated: Jan 12th 2018).
This is a public build.
11
▲ If you like this build or find it interesting, leave a thumbs up. It's not much but a little encouragement goes a long way.
<<<The Rohirrim>>>
--------------------------------------------------------------------------------------------------------------------------------------------------
CLASSES

 ►
►
 ►
►Swordsman C3 ► Cataphract C3 ►

 ►
►

Dragoon ► Lancer C2
--------------------------------------------------------------------------------------------------------------------------------------------------
Warning
1.This build focuses on high attack damage.
2.This build can go toe-to-toe when you enter dungeon to killing boss.
3.This build need a lot of patience and effort because Cataphract AOE skills a bit balanced after "Summer Balance Patch".
4.This build is DPS style by continuous do damage on single target and AOE, regarded as support damager in grinds and Earth Tower.
5.This build is great in PVP with string of skills.
--------------------------------------------------------------------------------------------------------------------------------------------------
Introduction
First of all , This class build for both PVP and PVE with many skill to encounter the different situations. The Cataphract attack skills mostly would be for grinding and doing support DPS in Earth Tower. The Dragoon & Lancer attack skills will provide necessary damage for PVP to skewer the enemy!
--------------------------------------------------------------------------------------------------------------------------------------------------
Version
Updated V.1 - Added suggested attributes for each rank up.
Updated V.1.2 - Added gear, gems, and card guide.
Updated V.2 - Added Battle Guide. :3
Updated V.2.1 - Added boss hunting guide.
Updated V.3 - Added Amulet and bracelet/ring guide. :3
Updated V.3.1 - Added Solmiki Pike as end game pike! :3
Updated V.4 - Added additional Q&A for Class Change Guide. Added art gallery.
Updated V.5 - Updated with rank 9! >:3.
--------------------------------------------------------------------------------------------------------------------------------------------------
CLASSES
RANK 1: Swordsman C1
Skill
Bash : 3 - for AOE and knockdown ability
Gung Ho : 2 - for extra physical damage at expense of def
Concentrate : MAX - for decent extra physical damage
Pain Barrier : MAX - so you won't get unwanted knockdown while doing your attack combo
Attribute
Bash: Knockdown : MAX - knockdown enemies in AOE
Bash: Splash : MAX - more AOE
Concentrate Enhance : MAX - more physical damage for your skill Concentrate
Increase Maximum Buff Count : MAX
Other attributes up to you!
RANK 2: Swordsman C2
Skill
Gung Ho : 3 - so you can use attribute to boost damage
Concentrate : 9 - for even more extra physical damage
Pain Barrier : Max - for longer time duration of not getting interrupted with attacks & combo
Restrain : Max - for chance to stun enemies with every attack
Attribute
Gung Ho Enhance : MAX - more physical damage for your skill Gung Ho
Restrain: Slow : MAX - after stun effect, enemy is inflicted by slow
Other attributes up to you!
RANK 3: Swordsman C3
Skill
Concentrate : 14 - because you need more physical damage
Restrain : Max - because you need to stun enemy for stun control!
(OPTIONAL) Double Slash : Max - Good fast attack skill. If you're not going for this option, put the points to max "Concentrate" and then the rest of skill points on "Pain Barrier"
Attribute
Pain Barrier : MAX - longer duration of skill
Other attributes up to you!
RANK 4: Cataphract C1
Skill
Impaler : 1 - use to skewer small/medium enemies then slap them unto other enemies!
Earth Wave : MAX - crowd control skill of Cataphract
Trot : Max - more movement speed to get to enemy fast or to get away to regrouop in some cases
Steed Charge : 1 - short burst to damage enemies in front
Attribute
Use Two Handed Spear : MAX - now you have big spear to skewer your enemies with! >:3
Companion Riding : MAX - now you are trained rider of Rohan!
Two Handed Spear Mastery : MAX - enemies' shields won't do them good
Earth Wave Remove Knockdown : MAX - if you do not wish enemies to scatter after skill
Earth Wave Earth Property : MAX - make skill be earth property
Steed Charge Remove Kockdown : MAX - if you don't want enemies to scatter after skill
Steed Charge Critical : MAX - enemies get hit with critical if afflicted with Slow
Other attributes up to you!
RANK 5: Cataphract C2
Skill
Earth Wave : MAX
Trot : Max - even more movement!
Doom Spike : Max - skewer enemies in front of you!
Attribute
Doom Spike Remove Knockdown : MAX - if you do not want enemy scatter after attack
Other attributes up to you!
RANK 6: Cataphract C3
Skill
Earth Wave : 13
Trot : Max - maximum movement!
Doom Spike : Max
Rush : Max - twirl your spear over your head like madman and watch mobs cry! >;3
Attribute
Rush: Stun : MAX - enemies get 1% chance to be stunned per attribute
Other attributes up to you!
RANK 7: Dragoon C1
Skill
Dragon Tooth : Max - another skill to skewer enemies to your front!
Serpentine : 4 - piercing combo against enemies
Gae Bulg : Max - throw your spear at the hunt! Just remember to get it back.... xD
Dragon Soar : 1 - chance to fling enemies into the air!
Attribute
Two Handed Spear Mastery: Big Game Hunter : MAX - deal more damage to big monsters and bosses! >:3
Dragon Soar: Shock : MAX - enemies get afflicted with Shock
Gae Bulg: Attack Zone : MAX - increase 2% physical & magical attack of allies
Gae Bulg: Defense Zone : MAX - increase 2% physical & magical defense of allies
Gae Bulg: Enhance : MAX - more damage with Gae Bulg
Serpentine: Bleeding : MAX - chance to cause bleeding based on character's STR
Other attributes up to you!
RANK 8: Lancer
Skill
Crush : 4 - just as name says: Crush your enemies! Enemy loses attack or defense for a while (as they contemplate wtf are they doing fighting you).
Quintain : 4 - combo with enemies hit by "Crush" for additional damage! >:3
Joust : 1 - use on mages/priest so they'll shut their mouth! No normal attack or skills for them! >;3
Unhorsing : 1 - only you deserves to be Eorlingas!
Initiate : MAX - who ever said your enemies can block your attacks? >;3
Attribute
Lancer: Knockdown Chance : MAX - more chance to knockdown enemies per attribute!
Crush: Enhance : MAX - more damage with Crush
Crush: Gear Destroy : MAX - decrease enemy physical attack & defense by 10% per attribute! >:3
Joust: Enhance : MAX - more damage with Joust
Quintain: Enhance : MAX - more damage with Quintain
Unhorsing: Enhance : MAX - more damage with Unhorsing
RANK 9: Lancer
Skill
Crush : 8 - just as name says: Crush your enemies even more! >:3
Quintain : 9 - combo with enemies hit by "Crush" for additional damage! >:3
Rhongomiant : Max – you have a giant spear so go and thrust it at the enemy where the sun doesn’t shine! >;3
(OPTIONAL) Prevent/color] : 1 – put at least one point on this skill to prevent yourself from receiving debuffs for two seconds. Great safety net during those critical PvP moments! If you do not wish to take “Prevent”, simply allocate the skill point to max out Quintain! :3
[color=red]Attribute
Quintain: Sure Victory : MAX – deal 3 hits to enemies under the Crush debuff. Make
Rhongomiant: Enhance : MAX - more damage with Rhongomiant
Rhongomiant: Stun : MAX – stuns enemy for 3 seconds! Make your enemy wreak their keyboards with their heads. LEL >:3
--------------------------------------------------------------------------------------------------------------------------------------------------
STATUS
Stat Build:
2:1 STR:CON - until you have 90 CON;
Then all on STR.
Total Stat Investment: 239 STR, 90 CON
Note: This does not include the free stat points from quests and Goddess statues nor does this include bonuses from equipment!
--------------------------------------------------------------------------------------------------------------------------------------------------
Gear Guide
Weapon
Lv.75 Sketis Spear
Lv.75 Lydeka Spear
Lv.120 Triton - Main 2H Spear at level 120, good for boss hunts and hunting grounds
Lv.120 Benesda - In case you can't get your hands on a Triton
Lv.170 Catacombs Pike - Main 2H Spear for boss hunts or grinding
Lv.170 Elements - Optional 2H Spear if you can't get Catacombs Pike
Lv.270 Lolopanther Pike - Main utility 2H Spear
Lv.270 Purine Migantis Pike - Optional utility 2H Spear
Lv.315 Regard Horn Pike - Main 2H Spear before Solmiki Pike
Lv.315 Purine Pevordimas Pike - Optional utility 2H Spear
Lv.330 Solmiki Pike - End game Pike! >:3
Armor
Lv.170 Nyx Plate Armor - Primary set before getting Lolopanther/Solmiki set
Lv.170 Nyx Plate Pants - Primary set before getting Lolopanther/Solmiki set
Lv.170 Nyx Plate Gloves - Primary set before getting Lolopanther/Solmiki set
Lv.170 Nyx Plate Greaves - Primary set before getting Lolopanther/Solmiki set
Lv.270 Lolopanther Plate Set - This set for PVP player or if you need more HP to survive
Lv.270 Lolopanther Leather Set - This set for PVE player or if you need more damage
Lv.330 Solmiki Lether Set
Lv.330 Solmiki Leather Armor
Lv.330 Solmiki Leather Pants
Lv.330 Solmiki Leather Gloves
Lv.330 Solmiki Leather Boots
Lv.330 Solmiki Plate Set
Lv.330 Solmiki Plate Mail
Lv.330 Solmiki Plate Leggings
Lv.330 Solmiki Plate Gauntlets
Lv.330 Solmiki Plate Armor
Amulet
Lv.120 Petamion - A must have at level 120
Lv.170 Max Petamion - A must have at level 170
Lv.270 Lolopanther Medal - For more STR, DEX and INT
Lv.315 Solmiki Medal Leather - For even more STR, DEX and INT
Lv.315 Solmiki Medal Plate - For even more STR, DEX and INT
Rings/Bracelets
Lv.40 Battle Bracelet - Expensive and rare item later used for crafting
Lv.170 Sissel Bracelet - Expensive and rare item but worth it for the damage output at the expense of a little accuracy
Lv.220 Phada - Optional ring/bracelet if w/o Sissel
Lv.270 Lolopanther Bracelet - Optional ring/bracelet for more CON and PDeF/MDef
Lv.315 Solmiki Bracelet Leather - Optional ring/bracelet for even more CON and PDeF/MDef
Lv.315 Solmiki Bracelet Plate - Optional ring/bracelet for even more CON and PDeF/MDef
Suggested Socketed Gems: (Ranked)
Main Weapon
(Best) Red - for more max attack damage (if you have enough critical rate)
(Option 2) Green - for more critical rate (CR) since DEX won't give you any come "Summer Patch 2017"
(Option 3) Yellow - for more critical attack (if you have enough critical rate)
Top/Bottom
(Best) Yellow - for more Physical Defense
(Option 2) Green - for more critical resistance
OR
(Option 2) Red - for more HP (better survivability)
(Option 4) Blue - for more SP pool
Boots
(Best) Blue - to defend against those pesky magic users >:3
(Option 2) Yellow - for more HP
Gauntlet
(Best) Yellow - to break blockers and make them cry >:3
(Option 2) Red - for more critical attack
OR
(Option 2) Green - for more accuracy
(Option 3) Blue - for more SP recovery
Suggested Card:
Suggested card would be Glass Mole Card. Each will give you +10% additional damage when using SP potion and this build will deal a whole lot of burst damage with Glass Mole Cards. Bring small sp potion for that extra burst in damage. :3

You may use Ellaganos card for extra +DEX in case you wish to additional block penetration.
You may also opt for Blut card for that extra +CON.
If you are having problems with Magic user classes then of course you may use Nuaele card for that boost in MDEF.
--------------------------------------------------------------------------------------------------------------------------------------------------
Battle Tactics

Here we shall learn the jousting prowess of a Lancer! Remember these basics and you'll be feared in the battlefield.
Things to remember:
1. Your primary weapon is a two handed spear. The option of bringing a single handed spear and a shield is optional.
2. Maintain your buffs! This will ensure you'll survive long enough to keep your enemies screaming.
3. Bring the necessary mount for battle: (Sample mounts presented below)
a. Battlebird - gives you hp/sp recovery buff (2 weapon slots, 2 armor slots);
b. Pengu/Penguin (not the Leaf Pengu) - gives you +50 physical def and +50 magic defense (2 weapon slots, 2 armor slots);
c. Guinea Pig - gives you +STR when mounted
4. Bring enough level 15 HP/SP potions and/or Elixirs in case you need them.
5. You might be a tank killer but do not attack them first. Priority for Lancer is to kill threats such as DPS Mages or full support Clerics.
6. You can turn off knockdown effect to do more combo.
7. You may take advantage of knockdown effect to destroy formations.
Lancer Battle Tactics
1. Basic combo:
Aggressive Stance 1 (Against DPS Mages or Support Clerics):
Joust > Crush > Quintain > Crush > Quintain > Impaler
Aggressive Stance 2 (Against DPS On-foot Swordsman):
Impaler > Crush > Quintain > Crush > Quintain > Dragon Soar > Unhorsing
Aggressive Stance 3 (Against DPS Mounted Swordsman/Archer):
Unhorsing > Impaler > Crush > Quintain > Crush > Quintain > Dragon Soar > Dragontooth
Aggressive Stance 4 (Against DPS On-foot Archer):
Gae Bulg > Impaler > Crush > Quintain > Crush > Quintain > Dragon Soar > Dragontooth
Aggressive Stance 5 (Against DPS On-foot Archer/Swordsman/Mage/Cleric):
Impaler > Crush > Quintain > Crush > Quintain > Serpentine > Dragon Soar > Dragontooth
2. Crowd Control combo:
Passive-Aggressive Stance (Make sure knockdown is turned on!):
Rush > Earth Wave > Dragon Soar > Doom Spike > Impaler
[size=20px]Boss Hunting Guide
Remember that Lancers can dish out a whole lot of pain to boss monsters. They do not necessarily need to tank but they should survive long enough to bring down the toughest of world bosses. Here is the basic tactic in fighting bosses:
1. Gae Bulg > Crush > Quintain > Crush > Quintain > Dragon Soar > Serpentine > Dragon Tooth > Unhorsing (Basic Combo):
2. Rush > Earth Wave > Doom Spike > Steed Charge (Basic Combo):
3. Rinse. Lather. Repeat. >:3
--------------------------------------------------------------------------------------------------------------------------------------------------
Class change Guide
Should I put SPR to get more SP and SP regen rate?
Ans: No. It would really be best to simply bring SP potion since you'll be needing those stats in STR for extra damage!
Should I put DEX for more block penetration?
Ans: No. At level 330, Lancer will have roughly 160 block penetration and when using "Initiate" buff skill you'll get 760 block penetration! So remember, no DEX! :3
Is 90 CON enough for the build?
Ans: This amount of invested CON will guarantee at least 47k HP which will make you not that easy to squish in battle. :3
Can I change Swordsman C3 to another class, like Doppelsoeldner for example?
Ans: As far as I know, you cannot use Cyclone while on mount so don't get your hopes up. xD
Can a Doppelsoeldner C3 outdamage this build in DPS?
Ans: That depends. If they have decently the same gear then yes and at the moment Doppelsoeldner is one of the top DPS for Swordsman class.
In terms of PvP however, this build can go toe-to-toe with the class because of the burst damage of Lancer + Dragoon skills. :3
Is your Dragoon Overlord variant better for PvE or is a mix of dragoon and lancer better
Ans: Technically speaking they're both deadly in PvP with nearly same capacity in PvE. I'll just drop the difference so it'll be more clear:
For "The Rohirrim" build:
- Uses Cataphract and Dragoon skills/attributes to deal devastating damage to mobs
- Combination of Dragoon and Lancer skills make the build deadly in PvP or single target or boss hunts
- Longer and more potent buffs due to Swordsman C3
- Main string is Lancer's "Crush" + "Quintain" to deal massive damage to mobs extremely lucky enough to survive the string of crowd control/killing skills of Cataphract
- This build uses less skills thus faster cycle of skills from Lancer and Dragoon
For the "Dragoon Overlord" build:
- Uses Cataphract and Dragoon skills/attributes to deal devastating damage to mobs
- Dragoon C2 skills make the build deadly in PvP or single target or boss hunts (with Dethrone to deal damage and incapacitate enemy movement)
- Potent buffs from Swordsman C2 boosted by Hoplite C1 "Finestra" buff
- Main string is Dragoon's "Serpentine" + "Dethrone" + "Stabbing" to deal massive damage to mobs unlucky enough to survive string of crowd control/killing skills of Cataphract
- This build uses more skills for more string damage (so of course more button mashing)
At the end of the day, it all boils down to button mashing. If you enjoy less button mashing then "The Rohirrim" build is for you but if you have no problem mashing a lot of buttons then feel free to use the "Dragoon Overlord" build.
Is maxing Trot good in PvE?
Ans: PvE or PvP, you need to max Trot! No true member of Eorlingas would wish less speed! You'll be using your speed to get in and deal massive damage to mobs and you'll also be needing max Trot to get enough speed to get out of sketchy situations. :3
Do you think corsair would fit this build?
Ans: Yes Corsair would also fit for this build. If ever you wish to trade Dragoon with Corsair, what you'll have to put in skill (if you wish to do PvP build) would be:
1) Iron Hook lvl5
2) Keel Haul lvl5
3) Jolly Roger lvl5
I refer to this build as the Crusader build.
--------------------------------------------------------------------------------------------------------------------------------------------------
Art Gallery
Art by MAGGI(Art designer of TOS) and AllanPrince

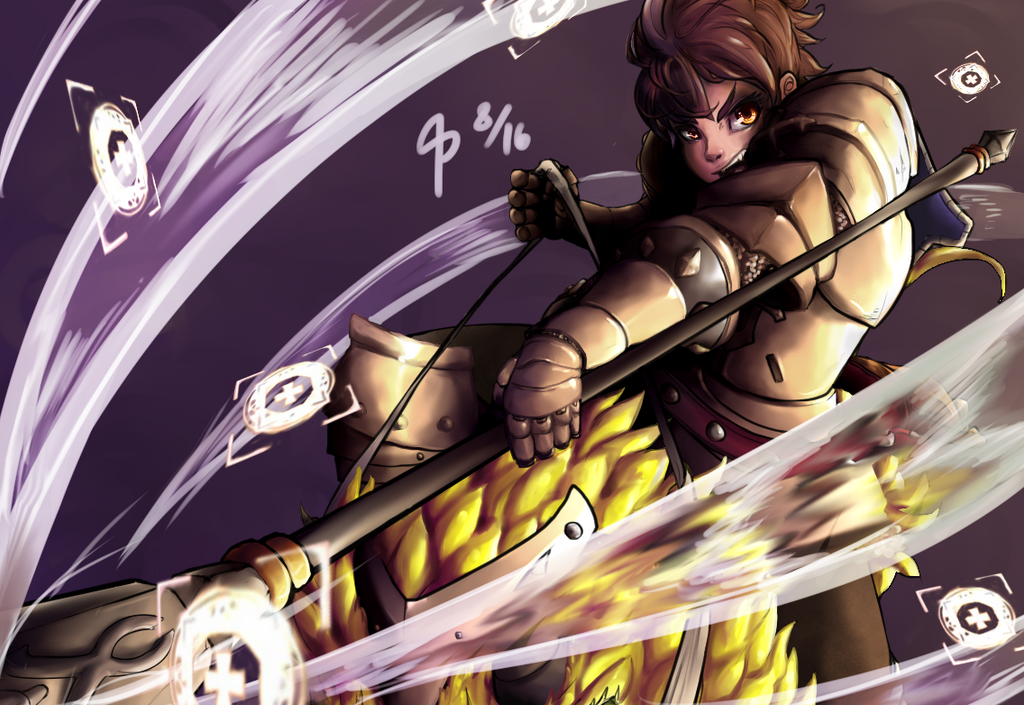
Just collect some art work about Dragoon and Lancer
PS. NO NPC Cataphract & Lancer master art because I dont like them. Both of them fugly. ༼ಢ_ಢ༽
--------------------------------------------------------------------------------------------------------------------------------------------------
If you have some question or any doubt please send me an PM or comment in the section below . let us discuss to create more PERFECT LANCER!!
Obscena stipitem egerunt contra omnes! ( ´-ω・)︻════════━━一
--------------------------------------------------------------------------------------------------------------------------------------------------
Other Guides by Rawrness13:
[DRAGOON] Dragoon Overlord
[Musketeer]Simo Häyhä a.k.a. "White Death"
[Musketeer]Patient Sniper
[Hoplite-Lancer]The Winged Hussars
[Squire-Lancer]The Royal Esquire
Rank 1
 Swordsman |
3 / 5 3 Bash: Enhance Type: Passive * Increases the damage dealt on an enemy with [Bash] by 0.5% per attribute level * +10% added damage at maximum level Swordsman 1st Circle required Bash: Splash Type: Active * Increases AoE attack ratio of [Bash] by 1 per attribute level * Increases SP consumption by 10% Swordsman 2nd Circle required Bash: Knockdown Type: Active * Enemies hit by [Bash] are knocked down * Increases SP consumption by 30% Lv3 Bash required Bash [Physical] - [Slash] Inflict damage on an enemy with a powerful attack. Level 3: Attack: 182% AoE Attack Ratio: 0 SP: 15 Type: Melee / Attack Cooldown: 6s 2 / 5 Gung Ho: Enhance Type: Passive * Amplifies physical damage increase effect and decreased defense effect of [Gung Ho] by 1% per attribute level Lv3 Gung Ho required Gung Ho Become determined by temporarily increasing your attack, while decreasing your defense. Level 2: Physical Damage: +12 Physical Defense: -6 Duration: 300 seconds SP: 11 Type: Melee / Buff Cooldown: 40s 5 / 5 Concentrate: Enhance Type: Passive * Increases additional damage of [Concentrate] by 1% per attribute level Lv3 Concentrate required Concentrate Increases your attack damage. Level 5: Additional Damage: +11 Number of Hits: 10 Duration: 45 seconds SP: 24 Type: Melee / Buff Cooldown: 20s 5 / 5 Pain Barrier: Duration Type: Active * Increases [Pain Barrier] duration for 5 seconds * Increases SP consumption by 10% Swordsman 3rd Circle required Pain Barrier Temporarily grants immunity to being affected by knockback, knockdown and stagger. Also increases the chance to resist status abnormalities. Level 5: Duration: 19 seconds SP: 59 Type: Melee / Buff Cooldown: 39s |
Rank 2
 Swordsman |
3 / 10 Gung Ho: Enhance Type: Passive * Amplifies physical damage increase effect and decreased defense effect of [Gung Ho] by 1% per attribute level Lv3 Gung Ho required Gung Ho Become determined by temporarily increasing your attack, while decreasing your defense. Level 3: Physical Damage: +14 Physical Defense: -7 Duration: 300 seconds SP: 14 Type: Melee / Buff Cooldown: 40s 9 / 10 Concentrate: Enhance Type: Passive * Increases additional damage of [Concentrate] by 1% per attribute level Lv3 Concentrate required Concentrate Increases your attack damage. Level 9: Additional Damage: +17 Number of Hits: 18 Duration: 45 seconds SP: 35 Type: Melee / Buff Cooldown: 20s 10 / 10 Pain Barrier: Duration Type: Active * Increases [Pain Barrier] duration for 5 seconds * Increases SP consumption by 10% Swordsman 3rd Circle required Pain Barrier Temporarily grants immunity to being affected by knockback, knockdown and stagger. Also increases the chance to resist status abnormalities. Level 10: Duration: 24 seconds SP: 93 Type: Melee / Buff Cooldown: 39s 5 / 5 Restrain: Slow Type: Active * Enemies stunned by [Restrain] become slowed down after stun wears off * Increases duration of slow effect by 3 seconds per attribute level * Increases SP consumption by 10% Swordsman 2nd Circle required Restrain Lowers your maximum HP, but your attacks have a high chance of stunning enemies. Level 5: Chance of Stunning Enemy: 30% Maximum HP: -75 Duration: 45 seconds SP: 30 Type: Melee / Buff Cooldown: 120s |
Rank 3
 Swordsman |
15 / 15 Concentrate: Enhance Type: Passive * Increases additional damage of [Concentrate] by 1% per attribute level Lv3 Concentrate required Concentrate Increases your attack damage. Level 15: Additional Damage: +26 Number of Hits: 30 Duration: 45 seconds SP: 52 Type: Melee / Buff Cooldown: 20s 14 / 15 Pain Barrier: Duration Type: Active * Increases [Pain Barrier] duration for 5 seconds * Increases SP consumption by 10% Swordsman 3rd Circle required Pain Barrier Temporarily grants immunity to being affected by knockback, knockdown and stagger. Also increases the chance to resist status abnormalities. Level 14: Duration: 28 seconds SP: 120 Type: Melee / Buff Cooldown: 39s 10 / 10 Restrain: Slow Type: Active * Enemies stunned by [Restrain] become slowed down after stun wears off * Increases duration of slow effect by 3 seconds per attribute level * Increases SP consumption by 10% Swordsman 2nd Circle required Restrain Lowers your maximum HP, but your attacks have a high chance of stunning enemies. Level 10: Chance of Stunning Enemy: 60% Maximum HP: -100 Duration: 60 seconds SP: 47 Type: Melee / Buff Cooldown: 120s |
|
Rank 4
Cataphract |
1 / 5 Impaler: Enhance Type: Passive * Increases the damage dealt on an enemy with [Impale Dagger] by 0.5% per attribute level * +10% added damage at maximum level Cataphract 1st Circle required Impaler [Strike] Impale a small or medium-type monster with the spear. Allows you to attack other enemies with the impaled enemy. The attack applies as critical to enemies afflicted with [Shock]. Level 1: Attack: 232% Duration: 0 seconds AoE Attack Ratio: 1 Able to use while riding SP: 26 Type: Melee / Attack Cooldown: 40s Required Stance: TwoHandSpear, OneHandSpearArtefact, OneHandSpearShield, OneHandSpearDagger, OneHandSpearPistol 5 / 5 3 Earth Wave: Enhance Type: Passive * Increases the damage dealt on an enemy with [Earth Wave] by 0.5% per attribute level * +10% added damage at maximum level Cataphract 1st Circle required Earth Wave: Earth Property Type: Active * Changes the property of [Earth Wave] to Earth property * Increases SP consumption by 10% Cataphract 1st Circle required Earth Wave: Remove Knockdown Type: Active * [Earth Wave] no longer knocks enemies down * Only applies if attribute is set to ON Cataphract 1st Circle required Earth Wave [Physical] - [Strike] Gather up power and use your weapon to attack targets by smashing it to the ground. Deals increased damage to knocked-down enemies. Level 5: Attack: 86% x 5 AoE Attack Ratio: 8 +50% increased damage to knocked-down enemies. Able to use while riding. SP: 52 Type: Melee / Attack Cooldown: 10s Required Stance: TwoHandSpear, OneHandSpearArtefact, OneHandSpearShield, OneHandSpearDagger, OneHandSpearPistol 5 / 5 Trot Increases your movement speed while riding. Level 5: Movement Speed: +10 Duration: 30 seconds SP: 53 Type: Melee / Buff Cooldown: 50s 1 / 5 Steed Charge: Enhance Type: Passive * Increases the damage dealt on an enemy with [Steed Charge] by 0.5% per attribute level * +10% added damage at maximum level Cataphract 1st Circle required Steed Charge: Critical Type: Active * [Steed Charge] applies as critical on enemies afflicted with [Slow] * Increases SP consumption by 20% Cataphract 1st Circle required Steed Charge: Remove Knockdown Type: Active * Removes knockback effect from [Steed Charge] * Only applies if attribute is set to ON * Increases SP consumption by 10% Cataphract 1st Circle required Steed Charge [Physical] - [Strike] Charges into the enemy, dealing damage. Deals additional damage to enemies affected by the Dethrone debuff. Able to use skill again 1.5 sec after casting. Level 1: Attack: 223% AoE Attack Ratio: 5 Able to use while riding SP: 26 Type: Melee / Attack Cooldown: 8s |
|
Rank 5
Cataphract |
10 / 10 3 Earth Wave: Enhance Type: Passive * Increases the damage dealt on an enemy with [Earth Wave] by 0.5% per attribute level * +10% added damage at maximum level Cataphract 1st Circle required Earth Wave: Earth Property Type: Active * Changes the property of [Earth Wave] to Earth property * Increases SP consumption by 10% Cataphract 1st Circle required Earth Wave: Remove Knockdown Type: Active * [Earth Wave] no longer knocks enemies down * Only applies if attribute is set to ON Cataphract 1st Circle required Earth Wave [Physical] - [Strike] Gather up power and use your weapon to attack targets by smashing it to the ground. Deals increased damage to knocked-down enemies. Level 10: Attack: 106% x 5 AoE Attack Ratio: 8 +50% increased damage to knocked-down enemies. Able to use while riding. SP: 82 Type: Melee / Attack Cooldown: 10s Required Stance: TwoHandSpear, OneHandSpearArtefact, OneHandSpearShield, OneHandSpearDagger, OneHandSpearPistol 10 / 10 Trot Increases your movement speed while riding. Level 10: Movement Speed: +15 Duration: 40 seconds SP: 85 Type: Melee / Buff Cooldown: 50s 5 / 5 Doom Spike: Enhance Type: Passive * Increases the damage dealt on an enemy with [Doom Spike] by 0.5% per attribute level * +10% added damage at maximum level Cataphract 2nd Circle required Doom Spike: Remove Knockdown Type: Active * Removes knockback effect from [Doom Spike] * Only applies if attribute is set to ON * Increases SP consumption by 10% Cataphract 2nd Circle required Doom Spike [Physical] - [Pierce] Strongly stabs the enemy with the tip of your spear, decreasing critical resistance. Level 5: Attack: 151% x 5 AoE Ratio: 8 Decreases critical resistance by 50 Able to use while riding. SP: 56 Type: Melee / Attack Cooldown: 15s Required Stance: TwoHandSpear, OneHandSpearArtefact, OneHandSpearShield, OneHandSpearDagger, OneHandSpearPistol |
|
Rank 6
Cataphract |
13 / 15 3 Earth Wave: Enhance Type: Passive * Increases the damage dealt on an enemy with [Earth Wave] by 0.5% per attribute level * +10% added damage at maximum level Cataphract 1st Circle required Earth Wave: Earth Property Type: Active * Changes the property of [Earth Wave] to Earth property * Increases SP consumption by 10% Cataphract 1st Circle required Earth Wave: Remove Knockdown Type: Active * [Earth Wave] no longer knocks enemies down * Only applies if attribute is set to ON Cataphract 1st Circle required Earth Wave [Physical] - [Strike] Gather up power and use your weapon to attack targets by smashing it to the ground. Deals increased damage to knocked-down enemies. Level 13: Attack: 117% x 5 AoE Attack Ratio: 8 +50% increased damage to knocked-down enemies. Able to use while riding. SP: 100 Type: Melee / Attack Cooldown: 10s Required Stance: TwoHandSpear, OneHandSpearArtefact, OneHandSpearShield, OneHandSpearDagger, OneHandSpearPistol 15 / 15 Trot Increases your movement speed while riding. Level 15: Movement Speed: +20 Duration: 50 seconds SP: 117 Type: Melee / Buff Cooldown: 50s 10 / 10 Doom Spike: Enhance Type: Passive * Increases the damage dealt on an enemy with [Doom Spike] by 0.5% per attribute level * +10% added damage at maximum level Cataphract 2nd Circle required Doom Spike: Remove Knockdown Type: Active * Removes knockback effect from [Doom Spike] * Only applies if attribute is set to ON * Increases SP consumption by 10% Cataphract 2nd Circle required Doom Spike [Physical] - [Pierce] Strongly stabs the enemy with the tip of your spear, decreasing critical resistance. Level 10: Attack: 192% x 5 AoE Ratio: 8 Decreases critical resistance by 100 Able to use while riding. SP: 89 Type: Melee / Attack Cooldown: 15s Required Stance: TwoHandSpear, OneHandSpearArtefact, OneHandSpearShield, OneHandSpearDagger, OneHandSpearPistol 5 / 5 Rush: Enhance Type: Passive * Increases the damage dealt on an enemy with [Rush] by 0.5% per attribute level * +10% added damage at maximum level Cataphract 3rd Circle required Rush: Stun Type: Active * Enemies attacked with [Rush] have a 1% chance per attribute level to be afflicted with [Stun] for 2 seconds * Increases SP consumption by 20% Cataphract 3rd Circle required Rush [Physical] - [Slash] Spins the spear above the head to inflict damage all around. Deals additional damage when the Initiate buff is applied. Level 5: 158% Attack per 0.3 seconds Maximum Duration: 10 seconds AoE Attack Ratio: 8 Able to use while riding Consumes #(CaptionRatio3} SP per 0.3 seconds SP: 0 Type: Melee / Attack Cooldown: 40s Required Stance: TwoHandSpear, OneHandSpearArtefact, OneHandSpearShield, OneHandSpearDagger, OneHandSpearPistol |
|
Rank 7
Dragoon |
5 / 5 Dragontooth: Enhance Type: Passive * Increases the damage dealt on an enemy with [Dragontooth] by 0.5% per attribute level * +10% added damage at maximum level Dragoon 1st Circle required Dragontooth [Physical] - [Pierce] Rotate your spear using centrifugal force to attack an enemy. Critical attack rate is doubled, and the skill gives additional effects based on the type of equipped spear. Level 5: Attack: 181% x 6 Ignores 50% of enemy defense when using a Two-handed Spear Critical damage +10% when using a One-handed Spear SP: 115 Type: Melee / Attack Cooldown: 15s Required Stance: OneHandSpearArtefact, OneHandSpearShield, TwoHandSpear, OneHandSpearDagger, OneHandSpearPistol 4 / 5 Serpentine: Enhance Type: Passive * Increases the damage dealt on an enemy with [Serpentine] by 0.5% per attribute level * +10% added damage at maximum level Dragoon 1st Circle required Serpentine: Bleeding Type: Active * Enemies hit by [Serpentine] have a 2% chance per attribute level of being afflicted with [Bleeding] for 8 seconds * Bleeding damage is proportional to character's physical attack * Increases SP consumption by 10% Dragoon 1st Circle required Serpentine: Additional Damage Type: Active * Enemies affected by [Serpentine] become vulnerable to physical melee attacks for 10 seconds and attacks gain 50% additional damage * Increases SP consumption by 50% Dragoon 2nd Circle Required Serpentine [Physical] - [Pierce] Use your spear to deal continuous damage to enemies in front of you. Level 4: Attack: 130% x 7 SP: 111 Type: Melee / Attack Cooldown: 20s Required Stance: OneHandSpearArtefact, OneHandSpearShield, TwoHandSpear, OneHandSpearDagger, OneHandSpearPistol 5 / 5 Gae Bulg: Enhance Type: Passive * Increases the damage dealt on an enemy with [Gae Bulg] by 0.5% per attribute level * +10% added damage at maximum level Dragoon 1st Circle required Gae Bulg: Defense Zone Type: Active * Creates a defense zone for 15 seconds where the spear is thrown * Increases physical defense and magic defense by 8% for party members within the zone * Increases SP consumption by 10% Lv. 5 Gae Bulg required Gae Bulg: Attack Zone Type: Active * Creates attack zone for 15 seconds where the spear is thrown. Increases physical attack and magic attack by 8% for party members within the zone * Increases SP consumption by 10% Lv. 5 Gae Bulg required Gae Bulg: Retrieve Type: Active * Spear thrown by skill [Gae Bulg] is automatically retrieved * Increase SP consumption by 50% Dragoon 3rd Circle Required Gae Bulg [Physical] - [Pierce] Attack several enemies within a radius by throwing a spear. Damaged enemies will temporarily become weaker to physical property attacks. The thrown spear must be picked up to use it again. Level 5: Attack: 1229% Status Ailment Duration: 7.5 seconds SP: 122 Type: Melee / Attack Cooldown: 30s Required Stance: OneHandSpearArtefact, OneHandSpearShield, TwoHandSpear, OneHandSpearDagger, OneHandSpearPistol 1 / 5 3 Dragon Soar: Enhance Type: Passive * Increases the damage dealt on an enemy with [Dragon Soar] by 0.5% per attribute level * +10% added damage at maximum level Dragoon 1st Circle required Dragon Soar: Shock Type: Active * Enemies hit by [Dragon Soar] have a 5% chance per attribute level to be afflicted with [Shock] for 10 seconds * Increases SP consumption by 10% Dragoon 1st Circle required Dragon Soar: Ascension Type: Active Applies double the hits with [Dragon Soar] * Increases SP consumption by 200% Requires Dragon Soar Lv 11 Dragon Soar [Physical] - [Slash] Vault into the air while swinging your spear upwards. Deals additional damage to flying enemies. Level 1: Attack: 161% x 5 +30% increased damage to flying type enemies SP: 51 Type: Melee / Attack Cooldown: 15s Required Stance: OneHandSpearArtefact, OneHandSpearShield, TwoHandSpear, OneHandSpearDagger, OneHandSpearPistol |
|
Rank 8
Lancer |
4 / 5 2 Crush: Enhance Type: Passive * Increases the damage dealt on an enemy with [Crush] by 0.5% per attribute level * +10% added damage at maximum level Lancer 1st Circle Required Crush: Gear Destroy Type: Active * Reduces enemy's physical defense and physical attack by an additional 10% per attribute level when attacked by [Crush] * Reduces enemy equipment's physical and magic defense by an additional 50% * Increases SP consumption by 10% Lancer 1st Circle Required Crush [Physical] - [Pierce] Lunge with your spear forward to pierce enemies in front. The target temporarily loses either attack or defense. If the target is an enemy summon, it will be displaced. Level 4: Attack: 1360% Debuff Duration: 10 seconds SP: 61 Type: Melee / Attack Cooldown: 20s Required Stance: TwoHandSpear 1 / 5 Joust: Enhance Type: Passive * Increases the damage dealt on an enemy with [Joust] by 0.5% per attribute level * +10% added damage at maximum level Lancer 1st Circle Required Joust [Physical] - [Pierce] Charges forward to lunge the spear at the enemy and destroy magic circles. The target's INT and SPR stats get reduced and cleric and wizard types will be silenced and normal attacks and skills cannot be used. Level 1: Attack: 332% x 2 Status Ailment Duration: 11 seconds Number of targets 10 SP: 41 Type: Melee / Attack Cooldown: 33s Required Stance: TwoHandSpear 1 / 5 Unhorsing: Enhance Type: Passive * Increases the damage dealt on an enemy with [Unhorsing] by 0.5% per attribute level * +10% added damage at maximum level Lancer 1st Circle Required Unhorsing [Physical] - [Pierce] Fix your grip on your spear and strike your enemy downward, knocking them off of their companion. Level 1: Attack: 987% SP: 39 Type: Melee / Attack Cooldown: 24s Required Stance: TwoHandSpear 4 / 5 2 Quintain: Enhance Type: Passive * Increases the damage dealt on an enemy with [Quintain] by 0.5% per attribute level * +10% added damage at maximum level Lancer 1st Circle Required Quintain: Sure Victory Type: Active * Applies 3 hits to enemies under the Crush debuff * Increases SP consumption by 30% Lancer 2nd Circle Required Quintain [Physical] - [Pierce] Push the spear far to attack. Enemies in Crush state get additional damage. Level 4: Attack: 1226% SP: 59 Type: Melee / Attack Cooldown: 20s Required Stance: TwoHandSpear 5 / 5 Initiate Strengthen your will before the battle. Increases the chance for you to penetrate the enemy's defense and the affected enemy's block stat can be decreased. Level 5: Block Penetration: +550 Enemy Block: -300 Duration: 25 seconds SP: 57 Type: Melee / Buff Cooldown: 54s |
|
Rank 9
Lancer |
8 / 10 2 Crush: Enhance Type: Passive * Increases the damage dealt on an enemy with [Crush] by 0.5% per attribute level * +10% added damage at maximum level Lancer 1st Circle Required Crush: Gear Destroy Type: Active * Reduces enemy's physical defense and physical attack by an additional 10% per attribute level when attacked by [Crush] * Reduces enemy equipment's physical and magic defense by an additional 50% * Increases SP consumption by 10% Lancer 1st Circle Required Crush [Physical] - [Pierce] Lunge with your spear forward to pierce enemies in front. The target temporarily loses either attack or defense. If the target is an enemy summon, it will be displaced. Level 8: Attack: 1617% Debuff Duration: 10 seconds SP: 90 Type: Melee / Attack Cooldown: 20s Required Stance: TwoHandSpear 9 / 10 2 Quintain: Enhance Type: Passive * Increases the damage dealt on an enemy with [Quintain] by 0.5% per attribute level * +10% added damage at maximum level Lancer 1st Circle Required Quintain: Sure Victory Type: Active * Applies 3 hits to enemies under the Crush debuff * Increases SP consumption by 30% Lancer 2nd Circle Required Quintain [Physical] - [Pierce] Push the spear far to attack. Enemies in Crush state get additional damage. Level 9: Attack: 1516% SP: 100 Type: Melee / Attack Cooldown: 20s Required Stance: TwoHandSpear 1 / 5 Prevent Become immune to all debuffs for a duration of time. Cooldown time decreases with skill level. Level 1: Cooldown decreased by 1 seconds Duration: 2 seconds SP: 40 Type: Melee / Buff Cooldown: 19s 5 / 5 Rhongomiant: Enhance Type: Passive * Increases the damage dealt on an enemy with [Rhongomiant] by 0.5% per attribute level * +10% added damage at maximum level Lancer 2nd Circle Required Rhongomiant: Stun Type: Active * Adds a 10% chance per property level for [Rhongomiant] to stun enemies for 3 seconds * Increases SP consumption by 20% Lancer 2nd Circle Required Rhongomiant [Physical] - [Pierce] Rush towards the enemy and deal damage. Upon hitting an enemy, you stop and deal increased damage based on the distance traveled. Level 5: Attack: 2353% SP: 54 Type: Melee / Attack Cooldown: 20s Required Stance: TwoHandSpear |
Advertisement
 ToS Taiwan
 ToS Reddit
Comments (36)
To answer your query, based on my initial testings for Lancer C2, there may be a bit of an update on the skill allocation. Since the build will go for Lancer C2 as rank 9, the Lancer will invest up to 9 skill points on Crush and Quintain, 1 skill point for Joust and Unhorsing, 5 skill points on Initiate, and 5 skill points on Rhongomiant. This is initial build I'm testing right now since I wish to maintain the level 5 Initiate to prevent the Lancer attacks from being blocked.
Other updated build I'm testing will have a level 3 Initiate and then max both Crush and Quintain. This will give the Lancer higher damage but less anti-blocking skills. I'll keep you guys updated on this one! :D
Hope that helped!
Obscena stipitem egerunt contra omnes! ( ´-ω・)︻════════━━一
(Translation: Impale everyone!)
To answer your questions:
1) Based from my experience, it is never a good idea to have 1H spear for a Lancer if you aim for more damage. You always go for the 2H spear as Lancer and the only time to go 1H spear + shield is when you're dashing towards an enemy to kidnap a victim (Priest or Wizard).
2) If you wish to go Corsair for rank 7, I'd suggest giving my [Corsair-Lancer]Crusader build (Link: http://www.tosbase.com/tools/skill-simulator/build/cxad1cd4s7/). Going this path may slightly remove your mobility as the Corsair skills may cause you to dismount (Jolly Roger) or stay put in one position while dealing damage (Keel Hauling).
3) Nope. No DEX for Lancers! :D
Hope that helped! :3
Obscena stipitem egerunt contra omnes! ( ´-ω・)︻════════━━一
(Translation: Impale everyone!)
Crush: Gear Destroy
* Enemies affected by [Serpentine] become vulnerable to physical melee attacks for 10 seconds and attacks gain 50% additional damage
* Increases SP consumption by 50%
Can i replace Sw3 with Hop1 ?
I love Finestra so much. xD
From my experience, Hoplite C1 is better with a pure Dragoon build. You may want to check out my Dragoon Overlord build for this. :D
Hope that helped! :3
Obscena stipitem egerunt contra omnes! ( ´-ω・)︻════════━━一
(Translation: Impale everyone!)
For PvE farming would you advise something else rank wise ?
Is maxing Trot good in PvE ?
Is your overlord variant better for PvE or is a mix of dragoon and lancer better ?
1) For PvE farming would you advise something else rank wise?
Ans: If you refer to PvE farming as "farming mats" then you are free to change Dragoon to Corsair, as you'll get the "Pillage" attribute which gives you chance to obtain mats each attack. Here is the link for my private build for this which I'm willing to share: http://www.tosbase.com/tools/skill-simulator/build/cxad1cd4s7/
If you however refer to farming weapon/armor cubes from Hunting Grounds then you'll have no problem with either "The Rohirrim" or the "Dragoon Overlord" build. Both offer enough killing prowess to kill single targets and mobs easy.
2) Is maxing Trot good in PvE?
Ans: PvE or PvP, you need to max Trot! No true member of Eorlingas would wish less speed! You'll be using your speed to get in and deal massive damage to mobs and you'll also be needing max Trot to get enough speed to get out of sketchy situations. :3
3) Is your overlord variant better for PvE or is a mix of dragoon and lancer better?
Ans: Technically speaking they're both deadly in PvP with nearly same capacity in PvE. I'll just drop the difference so it'll be more clear:
For "The Rohirrim" build:
- Uses Cataphract and Dragoon skills/attributes to deal devastating damage to mobs
- Combination of Dragoon and Lancer skills make the build deadly in PvP or single target or boss hunts
- Longer and more potent buffs due to Swordsman C3
- Main string is Lancer's "Crush" + "Quintain" to deal massive damage to mobs extremely lucky enough to survive the string of crowd control/killing skills of Cataphract
- This build uses less skills thus faster cycle of skills from Lancer and Dragoon
For the "Dragoon Overlord" build:
- Uses Cataphract and Dragoon skills/attributes to deal devastating damage to mobs
- Dragoon C2 skills make the build deadly in PvP or single target or boss hunts (with Dethrone to deal damage and incapacitate enemy movement)
- Potent buffs from Swordsman C2 boosted by Hoplite C1 "Finestra" buff
- Main string is Dragoon's "Serpentine" + "Dethrone" + "Stabbing" to deal massive damage to mobs unlucky enough to survive string of crowd control/killing skills of Cataphract
- This build uses more skills for more string damage (so of course more button mashing)
I honestly love them both but if I'll make a final judgement, I would say the Dragoon Overlord just a little bit more PvE capacity with Dragoon's "Dethrone" skill and Hoplite's "Stabbing" skill. This build also has more AoE capacity due to the "Finestra: Splash" attribute. It offers just a bit more in PvE capacity but do note that you'll be needed to mash a lot more buttons to string skills. Do note that Dragoons need to string/combo skills to be deadly!
The Rohirrim build though a bit more lacking in PvE I consider to be more fun to play with less button mashing, and faster skill rotation. The "Crush" + "Quintain" combo is great to deal with mobs who survive crowd control combo skills or simply to dispatch enemies who have greater HP than others (i.e. large type mobs). In addition to this of course, the Lancer "Initiate" skill removes enemy chance of blocking any of your attacks.
I guess at the end of the day it'll boil down to the idea if you enjoy button mashing or not. If you enjoy less button mashing then go with "The Rohirrim" build while if you have no problem mashing a lot of buttons then "Dragoon Overlord" build is for you.
I hope that helped! :3
Obscena stipitem egerunt contra omnes! ( ´-ω・)︻════════━━一
(Translation: Impale everyone!)
I have inserted Dragoon Overlord build. Link at the bottom of guide. :3
How do i get those cards and are there a way to farm them or just in dungeons ?
Farming the world boss monsters at the moment is a bit tricky since the appearance at one area is a bit more random than before. If you're dedicated enough, you can hunt them down on your own (or with a team).
Stay tune to another guide I'm making named the Dragoon Overlord with this build:
Swordsman C2 > Hoplite C1 > Cataphract C3 > Dragoon C2
Obscena stipitem egerunt contra omnes! ( ´-ω・)︻════════━━一
Come to think of it I'll remove option 2 so people won't get confused. No DEX! lol :3
Obscena stipitem egerunt contra omnes! ( ´-ω・)︻════════━━一
The Triton is obtained from Magnus Opus, an Alchemist skill. I wouldn't want you to worry to much in getting one if ever since you'll probably outgrow it as soon as you get to level 170. I'd suggest just getting a Benesda as soon as you get to level 120. It's a good enough 2H spear until you get the Impaler. :)
I hope that helps! :3
Obscena stipitem egerunt contra omnes! ( ´-ω・)︻════════━━一
This build used to have Impaler/Steed Charge level 5 at the expense of having lower "Earth Wave" but later on I realized that having higher "Earth Wave" is more important. You will need "Impaler" most of all in PvP when you're trying to make an enemy immobile and unable to attack (while you have him/her skewered!) or as I usually use it in PvP: To kidnap important member of enemy's team (i.e. Support Clerics and DPS Mages).
I hope that helped!
P.S. I'm sorry but I can't give away my in-game name due to privacy reasons but I can tell you that I hail from the "Telsiai (SEA)" server. I hope you understand. :3
Obscena stipitem egerunt contra omnes! ( ´-ω・)︻════════━━一
Also thank you for the info on Rush !
1) Iron Hook lvl5
2) Keel Haul lvl5
3) Jolly Roger lvl5
I hope that helped!
Obscena stipitem egerunt contra omnes! ( ´-ω・)︻════════━━一
Oh and good buy for Catacombs pike for 40k. :3
Obscena stipitem egerunt contra omnes! ( ´-ω・)︻════════━━一