(Shield)Wall Crusher by BJD - Complete Guide
Created by Suzushii on Jul 2nd 2016 (Last Updated: Jan 28th 2018).
This is a public build.
9
Ok, time to write it as it should be. If you are at an early stage of the game and want to build that has a future and can match it to yourself then you've come to the right place, my dear Shieldmaiden.
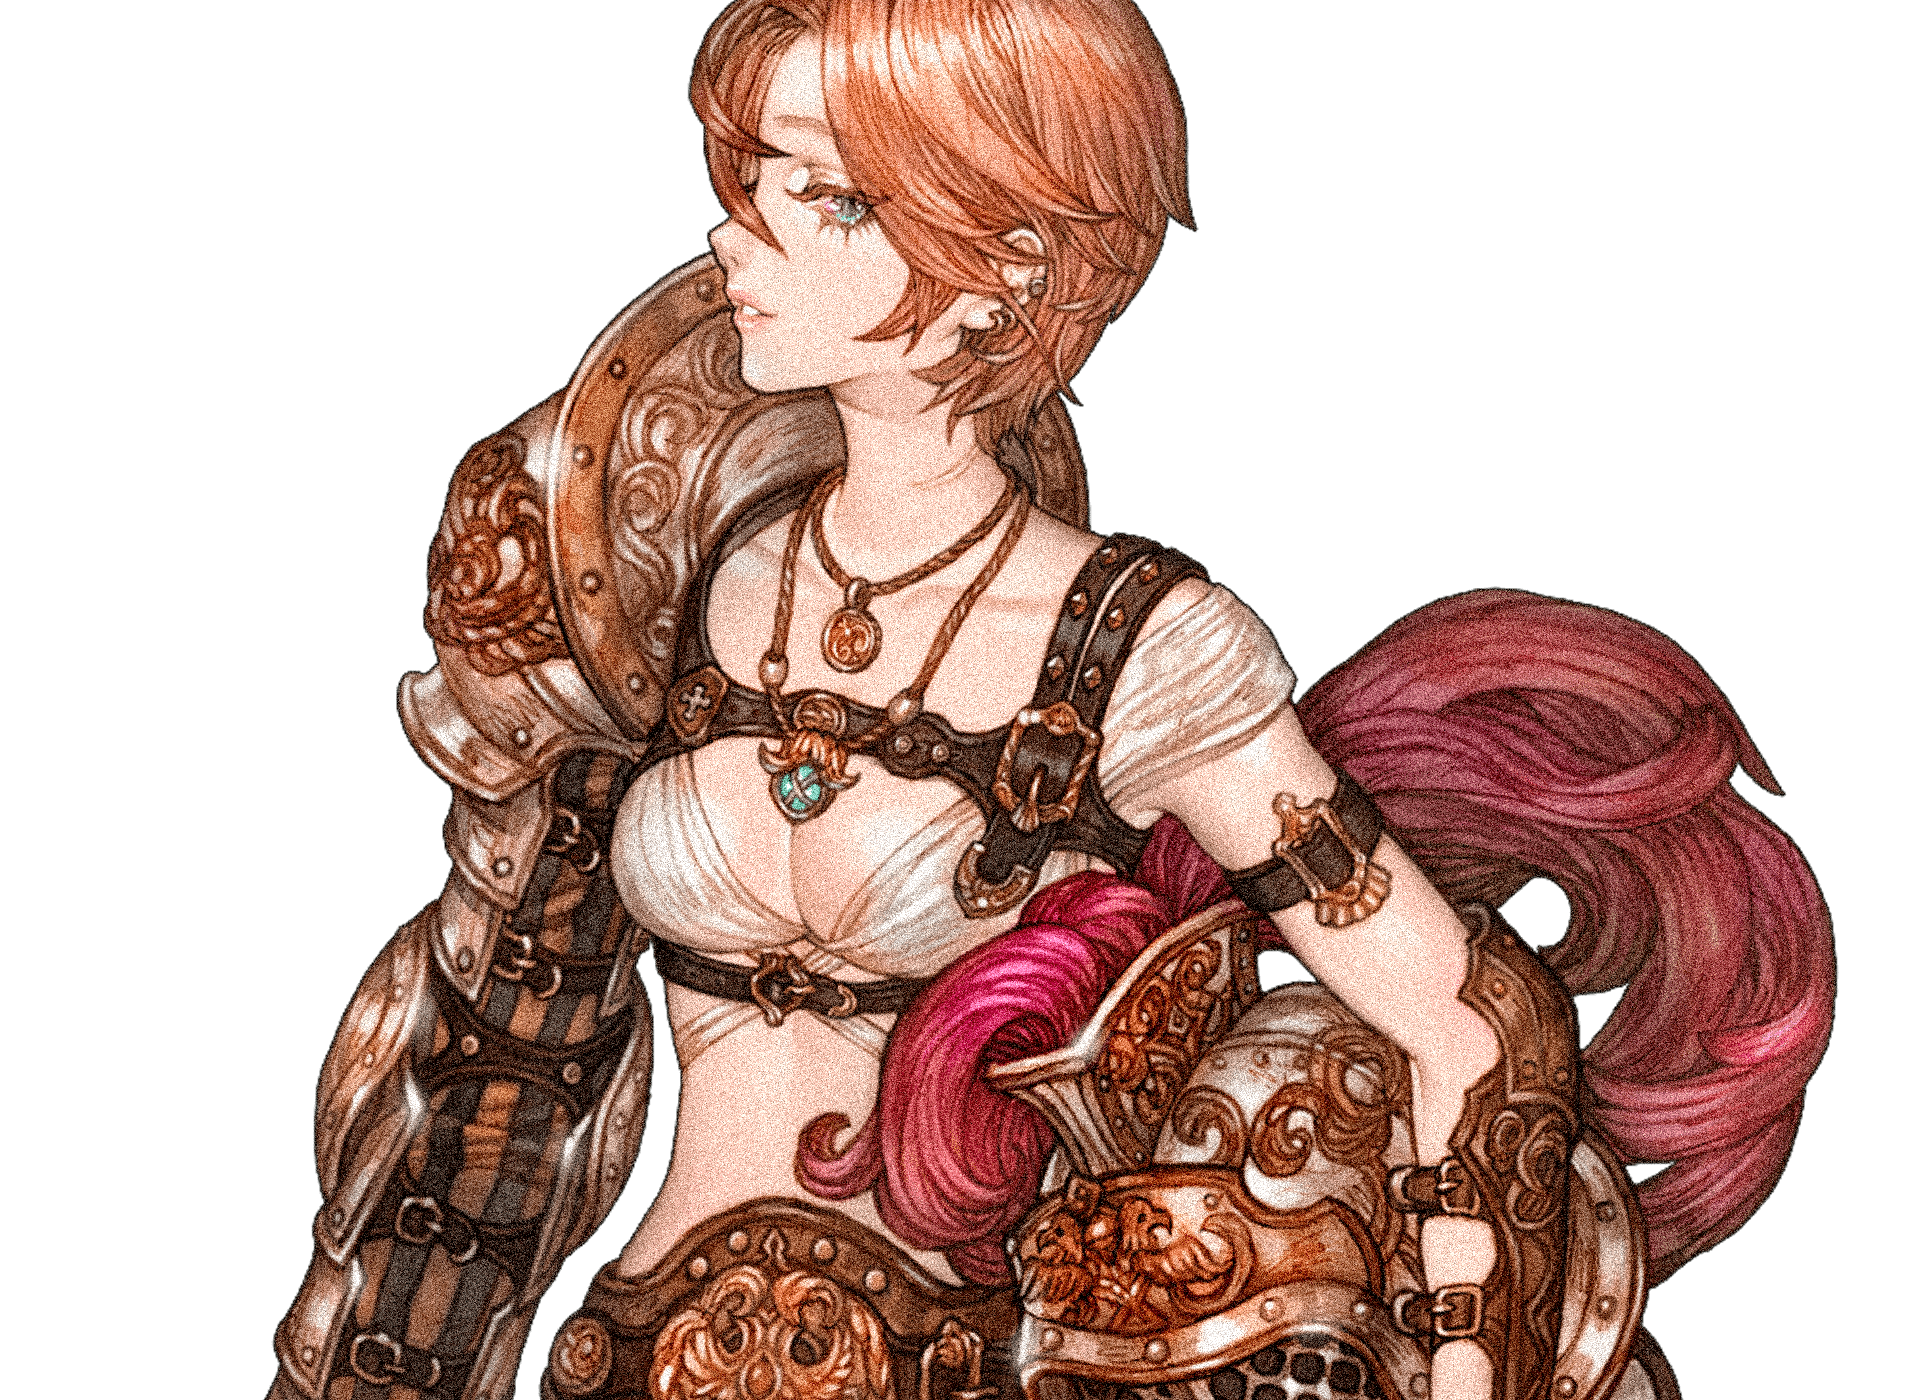
Murmillo Guide for beginners
Before we start. One thing needs to be explained. Use the shield! To defend, to attack, to a knockdown, to push back... And even to serve tea! Just don't make it complicated and don't force yourself to re-roll your character.
- Why Swordsman C1?
You are a tank. You don't need more than C1 because basic class don't offer anything special. So maximizes buffs from here, and go for some nice shield. Hung Ho + Concentrate allow you to leveling because this increase your damage. Monsters are weak up to 170 levels. Especially when you're running all the time in plate armor. Pain Barrier an obvious obviousness. Bosses in this game is a nightmare. Knockdown and knockdown and being struck. This allow you to avoid the frustration and the most important moments simply perform. The longer you're immune to knockdown the better! Right?
- Why Peltasta C2?
Because you use a shield! Peltasta give you "tank" status and allows you to pull mobs to you and increases your survival ability. In a nutshell.
Guardian [6/10] + High Guard [3/5] - basically allows you to be the wall. This is huge bonus when talking about physical damage. And another attribute Guardian: Evasion increases your evasion +18%.
Short corrections for these skills. Guardian (pDef +19% & pDmg -6%) High Guard (Block +170 & Attack -7%)

Swash Buckling [10/10] - Lure 20 opponents. And thanks to Swash Buckling: Maximum HP you have +25% HP bonus when this skill is active. More HP is always a good thing!
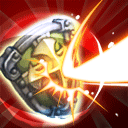
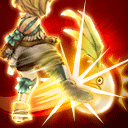
Umbo Blow [10/10] - The best skill from Peltasta. Damage is fine, you can also knock down the opponent... or rather make him fly. On the other hand if he don't want to fly, you can always stun him. Versatile and effective.
Rim Blow [1/10] - This one is... just is. You can use this to break an opponent's attack pushed him away. No knockdown or stun. In addition, only one hit when the previous skill have more than 1.
Avoid Shield Lob? Because this skill allows you to throw shield into your opponent. And after that you have to run and pick up shield. I do not recommend.
- Why Rodelero C3?
Because this class allow you to kill anything and was the most annoying player in the game. Mainly in TBL or GvG. In addition, the ability from the last circle, powerfully improve your attacks what is needed above the 280 level.
Shield Charge & Slithering [1/10] - To be able to do something that you first need to approach this! The first skill during your march allow you to knocks opponents and increases chance to block the missile attacks directed towards you. When second skill is the best thing ever from Rodelero class. Increases chances to evade and block enemy attacks and resistance against status ailments. So you can just move forward like a fearless warrior in your favorite story about knights. Attribute Slithering: Additional Damage additionally all strike attacks for 10 seconds inflict additional 100% more damage!

Montano [1/15] - Slash type hit. This is just another CC in your sleeve. Chance of paralysis and slow the enemy. Nothing more.

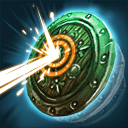
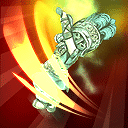
Targe Smash [13/15] - 1 hit strike type damage and 3 overheat. The second best skill for hitting enemies with your shield. For this large quantity of attributes make definitely worth it to use it as often as possible.
Shield Shoving [13/15] - Another strike type damage to deal damage. Something you need to be able to kill them right? In addition, this is another CC so worth it.

Shield Bash [10/10] - This skill is useful mainly for PvP. Lowers opponent statistics and of course inflicts a lot of damage. It should be usefull but on PvE this debuff is almost negligible.

Shooting Star [5/5] - The best skill from Rodelero class. 4 hit strike type damage and 2 overheat. One of the reasons why you need to have Rodelero C3.
High Kick [1/5] - Second reason why you pick Rodelero C3. 2 hit strike type damage and additionally enemies will temporarily take additional damage from any strike type damage.
Why skip Shield Push? Weak damage. And debuff Defense: -225 is not a big value Once above the 280 level opponents are more than 1,200 pDef.
- Why Murmillo C1?
Because this is wht are you came here you encased head! Ok ok, my fault. Murmillo is a class having two important tasks. Increase your attack and defense. How? Just look...
Cassis Crista [1/1] - The first thing you should have. Second is millions of silver to spent for attributes.
Enhanced Peltasta Shield Attack - While equipped with Cassis Crista, Peltastas' Rim Blow, Umbo Blow, Shield Lob Umbo Thrust skill attack damage increases by 40% per attribute level.
Enhanced Rodelero Shield Attack - While equipped with Cassis Crista, Rodelero's skill damage for Shield Charge, Targe Smash, Shield Push, Shield Shove and Shield Bash increases by 20% per attribute level.
Repeated Hits Attack Boost -While equipped with Cassis Crista, skill attack damage for Peltasta's Butterfly and Rodelero's Shooting Star increases by 15% per attribute level.
Frenzied Slash [1/5] - Jump and stun. This is useful to control the area.
Evade Thrust [3/5] - 1 hit pierce type skill. Increases your dodge chance when you attack, quite useful. Low cooldown 18 seconds only and after hit enemy will bleed if you have attribute for this skill.
Headbutt [5/5] - 1 hit strike type skill with ability to stun an opponent. Worthy at the moment because inflicts a huge damage. And with the new attribute opponent for 10 seconds and receives 50% additional damage from any strike type attacks.
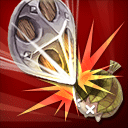
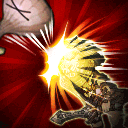
Scutum Hit [5/5] - 1 hit strike type skill and 3 overheat! This actually is main damage factor from Murmillo and... Just look!

- Why Templar?
Time for a brief explanation. This place has this class just because you would realize that here you can put almost anything. So if you want to become a Templar and set up a guild to recapture Jerusalem, then go ahead! Here is a list of things you can do.


Peltasta - You can but you don't must. You will only lose chance to gain something better. But if you want it then go ahead. Keep in mind to spend only one point in Guardian. These additional 5 points you need here.
Squire - Do you want to repair the equipment? Strengthen weapon before the fight? Stop Boss for a moment what allow your friends to beat him properly? Become familiar with this class then.
Corsair - See how works Jolly Roger. This is really good skill when you grind with friends or do some missions or dungeons. Iron Hook (does not work on Bosses) works well against players. If you want to do something in PvP and at the same time be more helpful in party, you should pick this class.
Doppelsoeldner - This may not be the best thing you have to choose... But Deeds of Valor and Earn Double Pay is the main reason why you may be interested in this class.
Templar - DEUS VULT! Because why not? If you want to set up a guild with friends then go ahead.
Or... If you want a really strong kick to your damage, there is something which you may be interest.
Actually, I think this is the best option here. Only one problem here is the fact that the entire Quest for Shinobi is a way through the circles of hell. Here is how to be Dante and experience your own Divina Commedia. If you're wondering if it's worthy...
If you are wondering how into Shinobi. Here you are.

Get ready for Bank robbery! The amount of silver needed here is a mountain! Or take Jerusalem to be able to pay.
Swordsman
Plate Mastery: Defense - 50 lvl
Provoke - 10 lvl
Weapon Swap - 1 lvl
Increased Maximum Buff Count - 1lvl
Bash: Knockdown - 1 lvl
Concentrate: Enhance - 50 lvl
Gung Ho: Enhance - 50 lvl
Peltasta
Guardian: Evasion - 3 lvl
Swash Buckling: Maximum HP - 5 lvl
Guard: Defense - 5 lvl
Shield Guard - 1 lvl
Shield Mastery: Block - 5 lvl
Umbo Blow: Stun - 5 lvl
Umbo Blow: Add Knockdown - 3 lvl
High Guard: Increased Defense - 50 lvl
High Guard: Umbo Blow Speciality - 5 lvl
Umbo Blow: Enhance - 100 lvl
Rodelero
Montano: Size Slow - 3 lvl
Shield Push: Duration - 5 lvl
Slithering: Additional Damage - 5 lvl
Targe Smash: Burn - 3 lvl
Targe Smash: Frozen Stone - 5 lvl
Targe Smash: Remove Knockback - 1 lvl
Targe Smash: Enhance - 100 lvl
Shooting Star: Enhance - 100 lvl
Shield Shoving: Enhance - 100 lvl
Shield Bash: Enhance - 100 lvl
Murmillo
Murmillo: Enhanced Manica - 10 lvl
Evade Thrust: Bleed - 5 lvl
Headbutt: Additional Damage - 5 lvl
Scutum Hit: Stun - 3 lvl
Enhanced Peltasta Shield Attack - 10 lvl
Enhanced Rodelero Shield Attack - 10 lvl
Repeated Hits Attack Boost - 10 lvl
Scutum Hit: Enhance - 50+ lvl
Headbutt: Enhance - 50+ lvl
And don't forget about attributes for your Rank 7 class!
CON and DEX is the best solution. STR can be too a little but I don't think it necessary. Only because Swordsman have great scale up for this stat and some ability scale with STR. Or if you spent already less than 50 points for this stat you can align it thanks to boss cards. But a lot of STR you have from items so don't worry and put like this.

As a result, you should have more than 40k HP which helps a lot when we are beaten by a horde of monsters or burnt alive by magic. We don't die in less than a few seconds at least. The proportions should be 1:2 CON:DEX. Second statistic gives us a lot of benefits like Evasion and Crit Chance. And if you decide to be Shinobi it's the best what we can do.
It makes no sense to talk about the absolute endgame. Sooner you kill yourself than you get items from ET40 so I will be more realistic.
Keep in mind that equipment here is very important. Especially when it comes to defense against magic. High chance of critical strike? Forgive me but better skip this, because you'll die before you kill anything. Besides, you are not Fencer C3 to focus on the statistics so. You are a defender and you have a different goal.
I separate the two types of equipment. So that it is easier to create your character. Equipment before and after the 280 level. Of course if we talking about armor type - Plate Armor of course!
Before 280 level
Necklace - Max Petamion
2x Bracelet - Rhevisan Bracelet
Top - Grynas Armor
Gloves - Oghma Gauntlets
Bottom - Grynas Leggings
Boots - Superior Kovos Greaves
Sword - Drake TailThis isn't a mistake, I really recomend here mace.
Shield - Didel Tower Shield
On 330 level
Necklace - Dhrag Necklace
2x Bracelet - Dhrag Bracelet
Top - Newt Plate Armor
Gloves - Swift Oghma Gauntlets
Bottom - Newt Plate Leggings
Boots - Shade Greaves
Sword -Pierene Sword or Abdochar
Shield - Lionhead Shield or Emengard Shield
Alternative items for Shield and Sword is very hard to get and much more expensive in craft. If you don't have a chance to progress Fantasy Library better take a cheaper option.
Note on accessories because it's possible to have some bonus from here. First, focus on HP bonus and pDmg. Third stat isn't necessary. There are sometimes extremely rare bonus (like AoE Attack Ratio) but don't force yourself to look for it.
Gems - Here we can get something really nice. If you are patient enough, you can even try to raise gems level to 10. But even 7 is already a very big bonus. And here I recomend future version of gems. kToS upgrade red/blue/yellow gems so now better invest in this way.
Top - Red Gems
Bottom - Red Gems
Gloves - Yellow Gems
Boots - Blue Gems
Weapon - Red Gems
Off hand - Green Gems
Cards - Ok, now a little more about Card system. Now each card we can use in our Card slot and this is great mechanic after all. Remember that each new rank gives us additional space for cards.

There isn't many cards good for Murmillo so i put all which in my opinion are good or just useful.
- Five or Six10 lvl Ellaganos Cards*This will allow you to spent 50 points in STR if you already spent some points in STR.
- One 10 lvl Dullahan Card
- One or more 10 lvl Nuaele Card *Actually this give % bonus.
- One or more 10 lvl Golem Card
- One or more 1 lvl Centaurus Card *Use it only to get an odd value AoE Attack Ratio. Despite the fact that the boss exist in the game, chance to get this card is almost impossible.
The number of cards it really is your will. I'm here suggested only option if you have a problem with decision.
Rank 9 or later? To Rank 9 certainly you are still Murmillo. But maybe on Rank 10 we got something interesting. If IMC planning only 10 ranks. There is a chance that they will give something interesting for many combinations, or even more than two classes. I look forward to rework the Centurion. Why I think this will appear? Centurion is a commander so this is perfect class for Templars, because they got last circle on Rank 9. And if last circle for Murmillo will be hopeless maybe we can get something interesting here.

So let's keep our fingers crossed and have hope.
Murmillo Guide for beginners
Explanation
Before we start. One thing needs to be explained. Use the shield! To defend, to attack, to a knockdown, to push back... And even to serve tea! Just don't make it complicated and don't force yourself to re-roll your character.
- Why Swordsman C1?
You are a tank. You don't need more than C1 because basic class don't offer anything special. So maximizes buffs from here, and go for some nice shield. Hung Ho + Concentrate allow you to leveling because this increase your damage. Monsters are weak up to 170 levels. Especially when you're running all the time in plate armor. Pain Barrier an obvious obviousness. Bosses in this game is a nightmare. Knockdown and knockdown and being struck. This allow you to avoid the frustration and the most important moments simply perform. The longer you're immune to knockdown the better! Right?
- Why Peltasta C2?
Because you use a shield! Peltasta give you "tank" status and allows you to pull mobs to you and increases your survival ability. In a nutshell.
Guardian [6/10] + High Guard [3/5] - basically allows you to be the wall. This is huge bonus when talking about physical damage. And another attribute Guardian: Evasion increases your evasion +18%.
Short corrections for these skills. Guardian (pDef +19% & pDmg -6%) High Guard (Block +170 & Attack -7%)
Swash Buckling [10/10] - Lure 20 opponents. And thanks to Swash Buckling: Maximum HP you have +25% HP bonus when this skill is active. More HP is always a good thing!
Umbo Blow [10/10] - The best skill from Peltasta. Damage is fine, you can also knock down the opponent... or rather make him fly. On the other hand if he don't want to fly, you can always stun him. Versatile and effective.
Rim Blow [1/10] - This one is... just is. You can use this to break an opponent's attack pushed him away. No knockdown or stun. In addition, only one hit when the previous skill have more than 1.
Avoid Shield Lob? Because this skill allows you to throw shield into your opponent. And after that you have to run and pick up shield. I do not recommend.
- Why Rodelero C3?
Because this class allow you to kill anything and was the most annoying player in the game. Mainly in TBL or GvG. In addition, the ability from the last circle, powerfully improve your attacks what is needed above the 280 level.
Shield Charge & Slithering [1/10] - To be able to do something that you first need to approach this! The first skill during your march allow you to knocks opponents and increases chance to block the missile attacks directed towards you. When second skill is the best thing ever from Rodelero class. Increases chances to evade and block enemy attacks and resistance against status ailments. So you can just move forward like a fearless warrior in your favorite story about knights. Attribute Slithering: Additional Damage additionally all strike attacks for 10 seconds inflict additional 100% more damage!
Montano [1/15] - Slash type hit. This is just another CC in your sleeve. Chance of paralysis and slow the enemy. Nothing more.
Targe Smash [13/15] - 1 hit strike type damage and 3 overheat. The second best skill for hitting enemies with your shield. For this large quantity of attributes make definitely worth it to use it as often as possible.
Shield Shoving [13/15] - Another strike type damage to deal damage. Something you need to be able to kill them right? In addition, this is another CC so worth it.
Shield Bash [10/10] - This skill is useful mainly for PvP. Lowers opponent statistics and of course inflicts a lot of damage. It should be usefull but on PvE this debuff is almost negligible.
Shooting Star [5/5] - The best skill from Rodelero class. 4 hit strike type damage and 2 overheat. One of the reasons why you need to have Rodelero C3.
High Kick [1/5] - Second reason why you pick Rodelero C3. 2 hit strike type damage and additionally enemies will temporarily take additional damage from any strike type damage.
Why skip Shield Push? Weak damage. And debuff Defense: -225 is not a big value Once above the 280 level opponents are more than 1,200 pDef.
- Why Murmillo C1?
Because this is wht are you came here you encased head! Ok ok, my fault. Murmillo is a class having two important tasks. Increase your attack and defense. How? Just look...
Cassis Crista [1/1] - The first thing you should have. Second is millions of silver to spent for attributes.
Enhanced Peltasta Shield Attack - While equipped with Cassis Crista, Peltastas' Rim Blow, Umbo Blow, Shield Lob Umbo Thrust skill attack damage increases by 40% per attribute level.
Enhanced Rodelero Shield Attack - While equipped with Cassis Crista, Rodelero's skill damage for Shield Charge, Targe Smash, Shield Push, Shield Shove and Shield Bash increases by 20% per attribute level.
Repeated Hits Attack Boost -While equipped with Cassis Crista, skill attack damage for Peltasta's Butterfly and Rodelero's Shooting Star increases by 15% per attribute level.
Frenzied Slash [1/5] - Jump and stun. This is useful to control the area.
Evade Thrust [3/5] - 1 hit pierce type skill. Increases your dodge chance when you attack, quite useful. Low cooldown 18 seconds only and after hit enemy will bleed if you have attribute for this skill.
Headbutt [5/5] - 1 hit strike type skill with ability to stun an opponent. Worthy at the moment because inflicts a huge damage. And with the new attribute opponent for 10 seconds and receives 50% additional damage from any strike type attacks.
Scutum Hit [5/5] - 1 hit strike type skill and 3 overheat! This actually is main damage factor from Murmillo and... Just look!
- Why Templar?
Time for a brief explanation. This place has this class just because you would realize that here you can put almost anything. So if you want to become a Templar and set up a guild to recapture Jerusalem, then go ahead! Here is a list of things you can do.
Peltasta - You can but you don't must. You will only lose chance to gain something better. But if you want it then go ahead. Keep in mind to spend only one point in Guardian. These additional 5 points you need here.
Squire - Do you want to repair the equipment? Strengthen weapon before the fight? Stop Boss for a moment what allow your friends to beat him properly? Become familiar with this class then.
Corsair - See how works Jolly Roger. This is really good skill when you grind with friends or do some missions or dungeons. Iron Hook (does not work on Bosses) works well against players. If you want to do something in PvP and at the same time be more helpful in party, you should pick this class.
Doppelsoeldner - This may not be the best thing you have to choose... But Deeds of Valor and Earn Double Pay is the main reason why you may be interested in this class.
Templar - DEUS VULT! Because why not? If you want to set up a guild with friends then go ahead.
Or... If you want a really strong kick to your damage, there is something which you may be interest.
Actually, I think this is the best option here. Only one problem here is the fact that the entire Quest for Shinobi is a way through the circles of hell. Here is how to be Dante and experience your own Divina Commedia. If you're wondering if it's worthy...
If you are wondering how into Shinobi. Here you are.
Attributes
Get ready for Bank robbery! The amount of silver needed here is a mountain! Or take Jerusalem to be able to pay.
Swordsman
Plate Mastery: Defense - 50 lvl
Provoke - 10 lvl
Weapon Swap - 1 lvl
Increased Maximum Buff Count - 1lvl
Bash: Knockdown - 1 lvl
Concentrate: Enhance - 50 lvl
Gung Ho: Enhance - 50 lvl
Peltasta
Guardian: Evasion - 3 lvl
Swash Buckling: Maximum HP - 5 lvl
Guard: Defense - 5 lvl
Shield Guard - 1 lvl
Shield Mastery: Block - 5 lvl
Umbo Blow: Stun - 5 lvl
Umbo Blow: Add Knockdown - 3 lvl
High Guard: Increased Defense - 50 lvl
High Guard: Umbo Blow Speciality - 5 lvl
Umbo Blow: Enhance - 100 lvl
Rodelero
Montano: Size Slow - 3 lvl
Shield Push: Duration - 5 lvl
Slithering: Additional Damage - 5 lvl
Targe Smash: Burn - 3 lvl
Targe Smash: Frozen Stone - 5 lvl
Targe Smash: Remove Knockback - 1 lvl
Targe Smash: Enhance - 100 lvl
Shooting Star: Enhance - 100 lvl
Shield Shoving: Enhance - 100 lvl
Shield Bash: Enhance - 100 lvl
Murmillo
Murmillo: Enhanced Manica - 10 lvl
Evade Thrust: Bleed - 5 lvl
Headbutt: Additional Damage - 5 lvl
Scutum Hit: Stun - 3 lvl
Enhanced Peltasta Shield Attack - 10 lvl
Enhanced Rodelero Shield Attack - 10 lvl
Repeated Hits Attack Boost - 10 lvl
Scutum Hit: Enhance - 50+ lvl
Headbutt: Enhance - 50+ lvl
And don't forget about attributes for your Rank 7 class!
Statistics
CON and DEX is the best solution. STR can be too a little but I don't think it necessary. Only because Swordsman have great scale up for this stat and some ability scale with STR. Or if you spent already less than 50 points for this stat you can align it thanks to boss cards. But a lot of STR you have from items so don't worry and put like this.
As a result, you should have more than 40k HP which helps a lot when we are beaten by a horde of monsters or burnt alive by magic. We don't die in less than a few seconds at least. The proportions should be 1:2 CON:DEX. Second statistic gives us a lot of benefits like Evasion and Crit Chance. And if you decide to be Shinobi it's the best what we can do.
Equipment
It makes no sense to talk about the absolute endgame. Sooner you kill yourself than you get items from ET40 so I will be more realistic.
Keep in mind that equipment here is very important. Especially when it comes to defense against magic. High chance of critical strike? Forgive me but better skip this, because you'll die before you kill anything. Besides, you are not Fencer C3 to focus on the statistics so. You are a defender and you have a different goal.
I separate the two types of equipment. So that it is easier to create your character. Equipment before and after the 280 level. Of course if we talking about armor type - Plate Armor of course!
Before 280 level
Necklace - Max Petamion
2x Bracelet - Rhevisan Bracelet
Top - Grynas Armor
Gloves - Oghma Gauntlets
Bottom - Grynas Leggings
Boots - Superior Kovos Greaves
Sword - Drake TailThis isn't a mistake, I really recomend here mace.
Shield - Didel Tower Shield
On 330 level
Necklace - Dhrag Necklace
2x Bracelet - Dhrag Bracelet
Top - Newt Plate Armor
Gloves - Swift Oghma Gauntlets
Bottom - Newt Plate Leggings
Boots - Shade Greaves
Sword -Pierene Sword or Abdochar
Shield - Lionhead Shield or Emengard Shield
Alternative items for Shield and Sword is very hard to get and much more expensive in craft. If you don't have a chance to progress Fantasy Library better take a cheaper option.
Note on accessories because it's possible to have some bonus from here. First, focus on HP bonus and pDmg. Third stat isn't necessary. There are sometimes extremely rare bonus (like AoE Attack Ratio) but don't force yourself to look for it.
Gems - Here we can get something really nice. If you are patient enough, you can even try to raise gems level to 10. But even 7 is already a very big bonus. And here I recomend future version of gems. kToS upgrade red/blue/yellow gems so now better invest in this way.
Top - Red Gems
Bottom - Red Gems
Gloves - Yellow Gems
Boots - Blue Gems
Weapon - Red Gems
Off hand - Green Gems
Cards - Ok, now a little more about Card system. Now each card we can use in our Card slot and this is great mechanic after all. Remember that each new rank gives us additional space for cards.
There isn't many cards good for Murmillo so i put all which in my opinion are good or just useful.
- Five or Six10 lvl Ellaganos Cards*This will allow you to spent 50 points in STR if you already spent some points in STR.
- One 10 lvl Dullahan Card
- One or more 10 lvl Nuaele Card *Actually this give % bonus.
- One or more 10 lvl Golem Card
- One or more 1 lvl Centaurus Card *Use it only to get an odd value AoE Attack Ratio. Despite the fact that the boss exist in the game, chance to get this card is almost impossible.
The number of cards it really is your will. I'm here suggested only option if you have a problem with decision.
Rank 9 or later? To Rank 9 certainly you are still Murmillo. But maybe on Rank 10 we got something interesting. If IMC planning only 10 ranks. There is a chance that they will give something interesting for many combinations, or even more than two classes. I look forward to rework the Centurion. Why I think this will appear? Centurion is a commander so this is perfect class for Templars, because they got last circle on Rank 9. And if last circle for Murmillo will be hopeless maybe we can get something interesting here.
So let's keep our fingers crossed and have hope.
Rank 1
 Swordsman |
3 / 5 3 Bash: Enhance Type: Passive * Increases the damage dealt on an enemy with [Bash] by 0.5% per attribute level * +10% added damage at maximum level Swordsman 1st Circle required Bash: Splash Type: Active * Increases AoE attack ratio of [Bash] by 1 per attribute level * Increases SP consumption by 10% Swordsman 2nd Circle required Bash: Knockdown Type: Active * Enemies hit by [Bash] are knocked down * Increases SP consumption by 30% Lv3 Bash required Bash [Physical] - [Slash] Inflict damage on an enemy with a powerful attack. Level 3: Attack: 182% AoE Attack Ratio: 0 SP: 15 Type: Melee / Attack Cooldown: 6s 3 / 5 Gung Ho: Enhance Type: Passive * Amplifies physical damage increase effect and decreased defense effect of [Gung Ho] by 1% per attribute level Lv3 Gung Ho required Gung Ho Become determined by temporarily increasing your attack, while decreasing your defense. Level 3: Physical Damage: +14 Physical Defense: -7 Duration: 300 seconds SP: 14 Type: Melee / Buff Cooldown: 40s 4 / 5 Concentrate: Enhance Type: Passive * Increases additional damage of [Concentrate] by 1% per attribute level Lv3 Concentrate required Concentrate Increases your attack damage. Level 4: Additional Damage: +9 Number of Hits: 8 Duration: 45 seconds SP: 21 Type: Melee / Buff Cooldown: 20s 5 / 5 Pain Barrier: Duration Type: Active * Increases [Pain Barrier] duration for 5 seconds * Increases SP consumption by 10% Swordsman 3rd Circle required Pain Barrier Temporarily grants immunity to being affected by knockback, knockdown and stagger. Also increases the chance to resist status abnormalities. Level 5: Duration: 19 seconds SP: 59 Type: Melee / Buff Cooldown: 39s |
|
Rank 2
Peltasta |
5 / 5 2 Umbo Blow: Enhance Type: Passive * Increases the damage dealt on an enemy with [Umbo Blow] by 0.5% per attribute level * +10% added damage at maximum level Peltasta 1st Circle required Umbo Blow: Stun Type: Active * Enemies hit by [Umbo Blow] have a 5% chance per attribute level to become afflicted with [Stun] for 3 seconds * Increases SP consumption by 10% Peltasta 1st Circle required Umbo Blow: Add Knockdown Type: Active * Enemies hit by [Umbo Blow] will be knocked down * Increases knockdown power by 40 per attribute level * Increases SP consumption by 10% Peltasta 1st Circle required Umbo Blow [Physical] - [Strike] Use the bump of your shield to attack enemies. Deals additional damage to enemies staggered by a block. If the attack is accurate, 30% of your shield's physical defense is added as extra physical attack and provocation applies 50 times higher. Level 5: Attack: 297% AoE Attack Ratio: 2 SP: 33 Type: Melee / Attack Cooldown: 12s Required Stance: OneHandSwordShield, OneHandSpearShield, RapierAndShield 1 / 5 2 Rim Blow: Enhance Type: Passive * Increases the damage dealt on an enemy with [Rim Blow] by 0.5% per attribute level * +10% added damage at maximum level Peltasta 1st Circle required Rim Blow [Physical] - [Strike] Use the edge of your shield to attack enemies. Inflicts additional damage on both petrified and frozen enemies. If the attack is accurate, 30% of your shield's physical defense is added as extra physical attack and provocation applies 50 times higher. Level 1: Attack: 244% AoE Attack Ratio: 1 SP: 15 Type: Melee / Attack Cooldown: 12s Required Stance: OneHandSwordShield, OneHandSpearShield, RapierAndShield 5 / 5 Swash Buckling: Focused Defense Type: Active * Decreases the damage taken by 5% per attribute level for 10 seconds when using [Swash Buckling] Peltasta 1st Circle required Swash Buckling: Provoque Specialty Type: Active * Increases [Provoke] effects by 10% per attribute level when [Swash Buckling] effect is applied Peltasta 2nd Circle required Swash Buckling: Maintain Provocation Type: Active * Increases duration of [Swash Buckling] by 1 second per attribute level Peltasta 2nd Circle required Swash Buckling Hit your shield to provoke nearby enemies making them pursue you. Provoked enemies' movement speed increases, and become immune to provoking skill for 30 seconds. Level 5: Targets 11 Provoke duration 5 sec Increases max. no. of targets by 11 for 35 sec SP: 34 Type: Melee / Attack Cooldown: 20s Required Stance: OneHandSwordShield, OneHandSpearShield, OneHandSwordDagger, OneHandSpearDagger, RapierAndShield, RapierAn 1 / 5 Guardian: Evasion Type: Active * Increases character's evasion by 50 per attribute level when [Guardian] is active * Increases SP consumption by 10% Peltasta 1st Circle required Guardian: Reduce Damage Type: Active * Reduces damage received by 20% while [Guardian] is active * Increases SP consumption by 30% Requires Peltasta Circle 2, Guardian Lv 6 Guardian Increases your physical and magic defense. Cannot be used with Gung Ho. Level 1: Physical and magic defense +100% Duration 20 sec SP: 14 Type: Melee / Buff Cooldown: 50s |
Rank 3
 Peltasta |
10 / 10 2 Umbo Blow: Enhance Type: Passive * Increases the damage dealt on an enemy with [Umbo Blow] by 0.5% per attribute level * +10% added damage at maximum level Peltasta 1st Circle required Umbo Blow: Stun Type: Active * Enemies hit by [Umbo Blow] have a 5% chance per attribute level to become afflicted with [Stun] for 3 seconds * Increases SP consumption by 10% Peltasta 1st Circle required Umbo Blow: Add Knockdown Type: Active * Enemies hit by [Umbo Blow] will be knocked down * Increases knockdown power by 40 per attribute level * Increases SP consumption by 10% Peltasta 1st Circle required Umbo Blow [Physical] - [Strike] Use the bump of your shield to attack enemies. Deals additional damage to enemies staggered by a block. If the attack is accurate, 30% of your shield's physical defense is added as extra physical attack and provocation applies 50 times higher. Level 10: Attack: 364% AoE Attack Ratio: 2 SP: 54 Type: Melee / Attack Cooldown: 12s Required Stance: OneHandSwordShield, OneHandSpearShield, RapierAndShield 10 / 10 Swash Buckling: Focused Defense Type: Active * Decreases the damage taken by 5% per attribute level for 10 seconds when using [Swash Buckling] Peltasta 1st Circle required Swash Buckling: Provoque Specialty Type: Active * Increases [Provoke] effects by 10% per attribute level when [Swash Buckling] effect is applied Peltasta 2nd Circle required Swash Buckling: Maintain Provocation Type: Active * Increases duration of [Swash Buckling] by 1 second per attribute level Peltasta 2nd Circle required Swash Buckling Hit your shield to provoke nearby enemies making them pursue you. Provoked enemies' movement speed increases, and become immune to provoking skill for 30 seconds. Level 10: Targets 16 Provoke duration 5 sec Increases max. no. of targets by 16 for 35 sec SP: 52 Type: Melee / Attack Cooldown: 20s Required Stance: OneHandSwordShield, OneHandSpearShield, OneHandSwordDagger, OneHandSpearDagger, RapierAndShield, RapierAn 6 / 10 Guardian: Evasion Type: Active * Increases character's evasion by 50 per attribute level when [Guardian] is active * Increases SP consumption by 10% Peltasta 1st Circle required Guardian: Reduce Damage Type: Active * Reduces damage received by 20% while [Guardian] is active * Increases SP consumption by 30% Requires Peltasta Circle 2, Guardian Lv 6 Guardian Increases your physical and magic defense. Cannot be used with Gung Ho. Level 6: Physical and magic defense +100% Duration 35 sec SP: 32 Type: Melee / Buff Cooldown: 50s 3 / 5 High Guard: Rim Blow Speciality Type: Active * [Rim Blow] damage increases 60% when [High Guard] is active * Damage increases by 10% per attribute level starting at Lv 2 Lv6 Rim Blow required High Guard: Umbo Blow Speciality Type: Active * [Umbo Blow] damage increases 60% when [High Guard] is active * Damage increases by 10% per attribute level starting at Lv 2 Lv6 Umbo Blow required High Guard Switch into an active defense stance using your shield. Increases your block. Level 3: Block +190 Duration 30 sec SP: 28 Type: Melee / Buff Cooldown: 60s Required Stance: OneHandSwordShield, OneHandSpearShield, RapierAndShield |
|
Rank 4
Rodelero |
1 / 5 Shield Charge: Enhance Type: Passive * Increases the damage dealt on an enemy with [Shield Charge] by 0.5% per attribute level * +10% added damage at maximum level Rodelero 1st Circle required Shield Charge [Physical] - [Strike] Use your shield and dash to push enemies away. Enemies nearby will fall down when hit with the shield. While Shield Charge is active, a chance to block missile attack will be increased. When the attack is accurate, adds 30% of shield's physical defense to your physical attack. Level 1: 141% Attack per 0.5 seconds Maximum Duration: 5 seconds Consumes STA SP: 27 Type: Melee / Attack Cooldown: 40s Required Stance: OneHandSwordShield, OneHandSpearShield, RapierAndShield 1 / 5 2 Montano: Enhance Type: Passive * Increases the damage dealt on an enemy with [Montano] by 0.5% per attribute level * +10% added damage at maximum level Rodelero 1st Circle required Montano: Size Slow Type: Active * Inflicts target with [Slow] for 10 seconds and increases duration of [Slow] by 3/2/1 seconds per attribute level on small/medium/large sized monsters respectively with [Montano] * Increases SP consumption by 10% Rodelero 1st Circle required Montano [Physical] - [Slash] Attack with a powerful slash on the lower half of an enemy with a chance to paralyze. Level 1: Attack: 413% [Stun] Duration: 1 second SP: 26 Type: Melee / Attack Cooldown: 15s 5 / 5 3 Targe Smash: Enhance Type: Passive * Increases the damage dealt on an enemy with [Targe Smash] by 0.5% per attribute level * +10% added damage at maximum level Rodelero 1st Circle required Targe Smash: Frozen Stone Type: Active * Inflicts 20% additional damage per attribute level on frozen and petrified enemies with [Targe Smash] * Increases SP consumption by 10% Rodelero 1st Circle required Targe Smash: Burn Type: Active * Defeating a burned enemy with [Targe Smash] applies [Burn] equal to the attribute level to other enemies * Increases SP consumption by 10% Rodelero 2nd Circle required Targe Smash: Remove Knockback Type: Active * Removes knockback effect from [Targe Smash] * Only applies if attribute is set to ON * Increases SP consumption by 10% Rodelero 1st Circle required Targe Smash [Physical] - [Strike] Use your shield to inflict damage on an enemy with a powerful smash. Chance of inflicting [Blind]. Adds additional damage to frozen and petrified enemies. When the attack is accurate, adds 30% of shield's physical defense to your physical attack. Level 5: Attack: 419 [Blind] Duration 3 seconds AoE Attack Ratio: 3 SP: 53 Type: Melee / Attack Cooldown: 22s Required Stance: OneHandSwordShield, OneHandSpearShield, RapierAndShield 5 / 5 2 Shield Shoving: Enhance Type: Passive * Increases the damage dealt on an enemy with [Shield Shoving] by 0.5% per attribute level * +10% added damage at maximum level Rodelero 1st Circle required Shield Shoving [Physical] - [Strike] Interrupt an enemy's action by using your shield. The enemy is turned around, and cannot take any actions temporarily. When the attack is accurate, adds 30% of shield's physical defense to your physical attack. Level 5: Attack: 357% Duration: 1.5 seconds SP: 41 Type: Melee / Attack Cooldown: 15s Required Stance: OneHandSwordShield, OneHandSpearShield, RapierAndShield |
|
Rank 5
Rodelero |
10 / 10 3 Targe Smash: Enhance Type: Passive * Increases the damage dealt on an enemy with [Targe Smash] by 0.5% per attribute level * +10% added damage at maximum level Rodelero 1st Circle required Targe Smash: Frozen Stone Type: Active * Inflicts 20% additional damage per attribute level on frozen and petrified enemies with [Targe Smash] * Increases SP consumption by 10% Rodelero 1st Circle required Targe Smash: Burn Type: Active * Defeating a burned enemy with [Targe Smash] applies [Burn] equal to the attribute level to other enemies * Increases SP consumption by 10% Rodelero 2nd Circle required Targe Smash: Remove Knockback Type: Active * Removes knockback effect from [Targe Smash] * Only applies if attribute is set to ON * Increases SP consumption by 10% Rodelero 1st Circle required Targe Smash [Physical] - [Strike] Use your shield to inflict damage on an enemy with a powerful smash. Chance of inflicting [Blind]. Adds additional damage to frozen and petrified enemies. When the attack is accurate, adds 30% of shield's physical defense to your physical attack. Level 10: Attack: 514 [Blind] Duration 3 seconds AoE Attack Ratio: 3 SP: 84 Type: Melee / Attack Cooldown: 22s Required Stance: OneHandSwordShield, OneHandSpearShield, RapierAndShield 10 / 10 2 Shield Shoving: Enhance Type: Passive * Increases the damage dealt on an enemy with [Shield Shoving] by 0.5% per attribute level * +10% added damage at maximum level Rodelero 1st Circle required Shield Shoving [Physical] - [Strike] Interrupt an enemy's action by using your shield. The enemy is turned around, and cannot take any actions temporarily. When the attack is accurate, adds 30% of shield's physical defense to your physical attack. Level 10: Attack: 437% Duration: 1.5 seconds SP: 67 Type: Melee / Attack Cooldown: 15s Required Stance: OneHandSwordShield, OneHandSpearShield, RapierAndShield 5 / 5 2 Shield Bash: Enhance Type: Passive * Increases the damage dealt on an enemy with [Bash] by 0.5% per attribute level * +10% added damage at maximum level Rodelero 2nd Circle required Shield Bash [Physical] - [Slash] Attack with your shield. The attacked enemy will have its stat points jumbled temporarily. When the attack is accurate, adds 30% of shield's physical defense to your physical attack. Level 5: Attack: 608% Duration: 10 seconds SP: 54 Type: Melee / Attack Cooldown: 25s Required Stance: OneHandSwordShield, OneHandSpearShield, RapierAndShield 1 / 5 Slithering: Enhance Type: Passive * Increases the damage dealt on an enemy with [Slithering] by 0.5% per attribute level * +10% added damage at maximum level Rodelero 2nd Circle required Slithering: Lower Slash Type: Active * Applies debuff to enemies attacked with Slithering * Reduces movement speed by 4 per attribute level * Reduces evasion by 15 per attribute level * Knocks down attacked enemies * Increases SP consumption by 10% Rodelero 2nd Circle required Slithering [Physical] - [Slash] Hold down the key to crouch and move forward. Increases chances to evade and block enemy attacks and resistance against status ailments. Triggers an attack immediately after movement has ended. When the attack is accurate, adds 30% of shield's physical defense to your physical attack. Level 1: Attack: 389% Maximum Duration: 10 seconds SP: 30 Type: Melee / Attack Cooldown: 20s Required Stance: OneHandSwordShield, OneHandSpearShield, RapierAndShield |
Rank 6
 Rodelero |
13 / 15 3 Targe Smash: Enhance Type: Passive * Increases the damage dealt on an enemy with [Targe Smash] by 0.5% per attribute level * +10% added damage at maximum level Rodelero 1st Circle required Targe Smash: Frozen Stone Type: Active * Inflicts 20% additional damage per attribute level on frozen and petrified enemies with [Targe Smash] * Increases SP consumption by 10% Rodelero 1st Circle required Targe Smash: Burn Type: Active * Defeating a burned enemy with [Targe Smash] applies [Burn] equal to the attribute level to other enemies * Increases SP consumption by 10% Rodelero 2nd Circle required Targe Smash: Remove Knockback Type: Active * Removes knockback effect from [Targe Smash] * Only applies if attribute is set to ON * Increases SP consumption by 10% Rodelero 1st Circle required Targe Smash [Physical] - [Strike] Use your shield to inflict damage on an enemy with a powerful smash. Chance of inflicting [Blind]. Adds additional damage to frozen and petrified enemies. When the attack is accurate, adds 30% of shield's physical defense to your physical attack. Level 13: Attack: 570 [Blind] Duration 3 seconds AoE Attack Ratio: 3 SP: 103 Type: Melee / Attack Cooldown: 22s Required Stance: OneHandSwordShield, OneHandSpearShield, RapierAndShield 13 / 15 2 Shield Shoving: Enhance Type: Passive * Increases the damage dealt on an enemy with [Shield Shoving] by 0.5% per attribute level * +10% added damage at maximum level Rodelero 1st Circle required Shield Shoving [Physical] - [Strike] Interrupt an enemy's action by using your shield. The enemy is turned around, and cannot take any actions temporarily. When the attack is accurate, adds 30% of shield's physical defense to your physical attack. Level 13: Attack: 486% Duration: 1.5 seconds SP: 82 Type: Melee / Attack Cooldown: 15s Required Stance: OneHandSwordShield, OneHandSpearShield, RapierAndShield 10 / 10 2 Shield Bash: Enhance Type: Passive * Increases the damage dealt on an enemy with [Bash] by 0.5% per attribute level * +10% added damage at maximum level Rodelero 2nd Circle required Shield Bash [Physical] - [Slash] Attack with your shield. The attacked enemy will have its stat points jumbled temporarily. When the attack is accurate, adds 30% of shield's physical defense to your physical attack. Level 10: Attack: 774% Duration: 15 seconds SP: 86 Type: Melee / Attack Cooldown: 25s Required Stance: OneHandSwordShield, OneHandSpearShield, RapierAndShield 5 / 5 2 Shooting Star: Enhance Type: Passive * Increases the damage dealt on an enemy with [Shooting Star] by 0.5% per attribute level * +10% added damage at maximum level Rodelero 3rd Circle required Shooting Star [Physical] - [Strike] Use your shield and sword to successively attack enemies. When the attack is accurate, adds 100% of shield's physical defense to your physical attack. Level 5: Attack: 306% x 4 AoE Attack Ratio: 1 SP: 58 Type: Melee / Attack Cooldown: 25s Required Stance: OneHandSwordShield, OneHandSpearShield, RapierAndShield 1 / 5 High Kick: Enhance Type: Passive * Increases the damage dealt on an enemy with [High Kick] by 0.5% per attribute level * +10% added damage at maximum level Rodelero 3rd Circle required High Kick [Physical] - [Strike] Perform a high kick to subdue an enemy. Hit enemies will temporarily take additional Strike damage. Level 1: Attack: 494% Duration: 10 seconds SP: 28 Type: Melee / Attack Cooldown: 15s Required Stance: OneHandSpearPistol, OneHandSwordPistol, OneHandSwordArtefact, OneHandSwordShield, OneHandSwordDagger, One |
|
Rank 7
Templar |
4 / 5 Summon Guild Member Summons a specific guild member to your location. You need permission from the specific guild member. Level 4: Guild Member Summon Count: 4 SP: 32 Type: Magic / Buff Cooldown: 600s Element: 1 / 1 Warp To Guild Member Warps to a specific guild member's location. You cannot warp to guild members who are in an instanced dungeon. Level 1: Warp To Specific Guild Member's Location SP: 14 Type: Magic / Buff Cooldown: 600s Element: 5 / 5 Build Guild Tower 길드 타워의 추가 기능을 사용할 수 있게 해줍니다. 길드 타워는 '길드 타워' 아이템을 사용해서 설치할 수 있습니다. 1레벨: 워프 이용 가능 2레벨: 창고 사용 가능 3레벨: 길드 성장 가능 4레벨: 길드 퀘스트 이용 가능 5레벨: 길드아지트 가능 Level 5: Improve Guild Tower Features SP: 0 Type: Melee / Attack Cooldown: 0s 5 / 5 Battle Orders Increases movement speed of guild members near the guild master to the maximum value. The effect disappears when moving away from the guild master. Decreases the movement speed of nearby enemies. Level 5: Duration: 9 seconds Enemy Movement Speed: -14 SP: 19 Type: Melee / Attack Cooldown: 60s |
|
Rank 8
Murmillo |
1 / 1 Enhanced Peltasta Shield Attack Type: Passive * While equipped with Cassis Crista, increases Rim Blow, Umbo Blow, Shield Lob and Umbo Thrust skill attack damage by 15% per attribute level Murmillo 1st Circle Required Enhanced Rodelero Shield Attack Type: Passive * While equipped with Cassis Crista, increases skill damage for Shield Charge, Targe Smash, Shield Push, Shield Shove and Shield Bash by 15% per attribute level Murmillo 1st Circle Required Repeated Hits Attack Boost Type: Passive * While equipped with Cassis Crista, increases skill attack damage for Butterfly and Shooting Star by 10% per attribute level Murmillo 1st Circle Required Enhanced Hoplite Shield Attack Type: Passive * While equipped with Cassis Crista, increases skill attack damage for Synchro Thrusting by 15% per attribute level Murmillo 1st Circle Required Cassis Crista Murmillo wears the Cassis Crista and prepares for the battle. Once the helmet is equipped, Murmillo skills can be used and the chance to avoid enemy missile or magic attacks increases, while the chance to evade melee attacks decreases. Use the skill again to unequip the helmet. Level 1: Maximum Level: 1 SP: 0 Type: Melee / Buff Cooldown: 1s Required Stance: OneHandSword, OneHandSwordShield, OneHandSwordDagger, OneHandSwordArtefact, OneHandSpearArtefact, OneHand 1 / 5 Frenzied Slash: Enhance Type: Passive * Increases the damage dealt on an enemy with [Frenzied Slash] by 0.5% per attribute level * +10% added damage at maximum level Murmillo 1st Circle Required Frenzied Slash [Physical] - [Slash] Perform a large leap forwards and strike foes on the ground. Enemies hit are temporarily stunned. Level 1: Attack: 843% Number of Targets: 5 Able to use while wearing the helmet SP: 58 Type: Melee / Attack Cooldown: 27s Required Stance: OneHandSword, OneHandSwordShield, OneHandSwordDagger, OneHandSwordArtefact, OneHandSpearArtefact, OneHand 3 / 5 2 Evade Thrust: Enhance Type: Passive * Increases the damage dealt on an enemy with [Evade Thrust] by 0.5% per attribute level * +10% added damage at maximum level Murmillo 1st Circle Required Evade Thrust: Bleed Type: Active * [Evade Thrust] gains 2% chance of afflicting the enemy with [Bleeding] for 25 seconds * Bleed damage is proportional to the character's STR * Increases SP consumption by 10% Murmillo 1st Circle Required Evade Thrust [Physical] - [Pierce] Lunges the sword at the enemy's neck while defending one's self behind the shield. Level 3: Attack: 1202% AoE Attack Ratio: 2 Able to use while wearing the helmet SP: 62 Type: Melee / Attack Cooldown: 18s Required Stance: OneHandSwordShield, OneHandSpearShield, RapierAndShield 1 / 5 2 Headbutt: Enhance Type: Passive * Increases the damage dealt on an enemy with [Headbutt] by 0.5% per attribute level * +10% added damage at maximum level Murmillo 1st Circle Required Headbutt: Additional Damage Type: Active * Enemies hit by [Headbutt] become vulnerable to [Strike] attacks for 10 seconds * Increases additional damage by 6% per attribute level * Increases SP consumption by 10% Murmillo 1st Circle Required Headbutt [Physical] - [Strike] Headbutt the target and turn the target around. There is a chance for enemies getting stunned and if you are not equipped with a helmet, you might too. Level 1: Attack: 811% [Stun]Duration: 3 seconds SP: 54 Type: Melee / Attack Cooldown: 21s Required Stance: OneHandSword, OneHandSwordShield, OneHandSwordDagger, OneHandSwordArtefact, OneHandSpearArtefact, OneHand 1 / 5 3 Scutum Hit: Enhance Type: Passive * Increases the damage dealt on an enemy with [Scutum Hit] by 0.5% per attribute level * +10% added damage at maximum level Murmillo 1st Circle Required Scutum Hit: Stun Type: Active * Enemies hit by [Scutum Hit] have a 5% chance per attribute level to become afflicted with [Stun] for 2 seconds * [Stun] chance increases by 3% per attribute level * Increases SP consumption by 10% Murmillo 1st Circle Required Scutum Hit: Wide Area Attack Type: Active * Increases Scutum Hit AoE attack ratio by 2x * Increases SP consumption by 10% Murmillo 2nd Circle Required Scutum Hit [Physical] - [Strike] Swings the shield to attack enemies in front. When the attack is accurate, adds 30% of shield's physical defense to your physical attack. Level 1: Attack: 1008% AoE Attack Ratio: 3 SP: 54 Type: Melee / Attack Cooldown: 30s Required Stance: OneHandSwordShield, OneHandSpearShield, RapierAndShield |
|
Rank 9
Murmillo |
10 / 10 Frenzied Slash: Enhance Type: Passive * Increases the damage dealt on an enemy with [Frenzied Slash] by 0.5% per attribute level * +10% added damage at maximum level Murmillo 1st Circle Required Frenzied Slash [Physical] - [Slash] Perform a large leap forwards and strike foes on the ground. Enemies hit are temporarily stunned. Level 10: Attack: 1260% Number of Targets: 14 Able to use while wearing the helmet SP: 242 Type: Melee / Attack Cooldown: 27s Required Stance: OneHandSword, OneHandSwordShield, OneHandSwordDagger, OneHandSwordArtefact, OneHandSpearArtefact, OneHand 10 / 10 2 Evade Thrust: Enhance Type: Passive * Increases the damage dealt on an enemy with [Evade Thrust] by 0.5% per attribute level * +10% added damage at maximum level Murmillo 1st Circle Required Evade Thrust: Bleed Type: Active * [Evade Thrust] gains 2% chance of afflicting the enemy with [Bleeding] for 25 seconds * Bleed damage is proportional to the character's STR * Increases SP consumption by 10% Murmillo 1st Circle Required Evade Thrust [Physical] - [Pierce] Lunges the sword at the enemy's neck while defending one's self behind the shield. Level 10: Attack: 1619% AoE Attack Ratio: 2 Able to use while wearing the helmet SP: 116 Type: Melee / Attack Cooldown: 18s Required Stance: OneHandSwordShield, OneHandSpearShield, RapierAndShield 2 / 10 2 Headbutt: Enhance Type: Passive * Increases the damage dealt on an enemy with [Headbutt] by 0.5% per attribute level * +10% added damage at maximum level Murmillo 1st Circle Required Headbutt: Additional Damage Type: Active * Enemies hit by [Headbutt] become vulnerable to [Strike] attacks for 10 seconds * Increases additional damage by 6% per attribute level * Increases SP consumption by 10% Murmillo 1st Circle Required Headbutt [Physical] - [Strike] Headbutt the target and turn the target around. There is a chance for enemies getting stunned and if you are not equipped with a helmet, you might too. Level 2: Attack: 855% [Stun]Duration: 3 seconds SP: 63 Type: Melee / Attack Cooldown: 21s Required Stance: OneHandSword, OneHandSwordShield, OneHandSwordDagger, OneHandSwordArtefact, OneHandSpearArtefact, OneHand 1 / 5 Shield Train: Enhance Type: Passive * Increases the damage dealt on an enemy with [Shield Train] by 0.5% per attribute level * +10% added damage at maximum level Murmillo 2nd Circle Required Shield Train [Physical] - [Strike] Rush ahead with your shield and push enemies forward. Then, strike the ground with your shield to gather the enemies in front of you. When the attack is accurate, adds 30% of shield's physical defense to your physical attack. Level 1: Attack 930% x 2 AoE Attack Ratio 10 SP: 58 Type: Melee / Attack Cooldown: 25s Required Stance: OneHandSwordShield, OneHandSpearShield, RapierAndShield 5 / 5 Sprint Increases your movement speed instantaneously. Movement speed is increased further with more enemies nearby. Level 5: Duration: 15 seconds SP: 88 Type: Melee / Buff Cooldown: 20s Required Stance: OneHandSword, OneHandSwordShield, OneHandSwordDagger, OneHandSwordArtefact, OneHandSpearArtefact, OneHand |
Advertisement
 ToS Taiwan
 ToS Reddit
Comments (47)
I really like blades.
I understand someone (Like me) just look on tree and it's enough. But if someone aren't sure then should read description to know why it's here. And you have for every single classa separate paragraph. Finding answer there would take 3-5 seconds.
Alternative items for Shield and Sword is very hard to get and much more expensive in craft. If you don't have a chance to progress Fantasy Library better take a cheaper option.
This shield is easy to get, receipt drops from lvl 290 Dungeon, trash mobs not Boss Cube.
- Take [Shield Lob] to at least 1.
- Take [Shield Push] to at least 1.
- [Scutum Hit] 5/5 so you did listen to critics.
- [Guardian] level 6 ? Why not 1, but ok.
"Sword -Pierene Sword or Abdochar" why sword not mace ? For Example https://tos.neet.tv/items/203204 , Great damage also is a [Strike] damage type, and you got +200% damage as a strike multiplier. 20 CON = 20 x 85 = +1700 Max HP, Crit Resist and +Min/Max Attack.
"- One or more 10 lvl Nuaele Card *Actually this give % bonus." - False
Maybe you you mean http://www.tosbase.com/database/items/644123/ gives +% bonus.
"- Five or Six10 lvl Ellaganos Cards*This will allow you to spent 50 points in STR if you already spent some points in STR.
- One 10 lvl Dullahan Card
- One or more 10 lvl Nuaele Card *Actually this give % bonus.
- One or more 10 lvl Golem Card
- One or more 1 lvl Centaurus Card *Use it only to get an odd value AoE Attack Ratio. Despite the fact that the boss exist in the game, chance to get this card is almost impossible."
Glass Mole, 8 x 10* of this or Yeti cards 2 or less.
Also worth to mention you get 39 Additional points to invest from Main Quests/Statues.
"Rank 9 or later? To Rank 9 certainly you are still Murmillo." - What for ? You already got all buffs for Pelt / Rode. Feel free to go other Rank 9 classes. Unless Murmillo got great skill on C2 like Dragoons [Dethrone] or all Rank 9 classes are bad.
what about Pelt1>hop2>rod3?
so, we really need to go for pelt 2 or i can try that route?
Murmilo Skills works with Spear, you can go Hop 2
What for ? [Shooting Star] and +150% damage from [Cassis Crista] attribute ?
IMHO Not worth, same for Corsair Rank 7, only for [Iron Hook], not worth it.
But what options we actually have ? For SW1>Pelt2>Rode2>?>?>Murmillo
- Fencer C2
- Corsair C2
- Squire C2
- Doppelsoeldner C2
Regarding Skills distribution:
- Swordsman C1:
Gung Ho - not worth to take more than 3, due to +6 damage bonus for 2 points invested. You need lvl 3 for attribute only.
Bash - level 3 will help you to obtain another Crowd Control skill that has high hit box and range. Highly recommended to have Bash 3. You can sacrifice 1 point from [Pain Barrier] and 2 From [Gung Ho].
- Rode C1/2:
Having [Montano] higher level increases your number of damage types. Coz restricting yourself to [Strike] only damage could cause problems if you fight vs. not [Plate] target. And [Targe Smash] and [Shield Shoving] get +200% bonus from [Cassis Crista] so no need to get them really high (coz static damage increase is miserable).
- Murmillo C1
What is real miss is [Scutum Hit] level 3 instead of 5. You miss 1531 damage there on the spot, for really fast animation and wide range skill. Why not 4 and 4 on [Evade Thrust] and [Headbutt] ?
But for the secure Rank 8/9 i would suggest to have level 1 for all except [Scutum Hit] (if you want to secure yourself from Skill Reset).
And regarding Stats: Swordie get most HP out of all jobs from CON point. And there are only 2 stats worth to invest coz equips scale your other stats better them points invested in STR/INT/SPR. So yeah DEX/CON, DEX to get 50% Crit Chance (with 3 x 6* Green Gems in Rapier/Sword + Shield and 2xSissels you need 314 DEX, 242 points invested) and all other to the CON, this results in 155 CON total.
Why not STR: Full STR invested gets 824 STR stat, this is +824 Damage and +824 Crit Attack (remember full STR, so crit is 0~5%) what is not useful due to no Crit % chance. 824 Damage is it big or small value ?
- Small - why ? Coz new 9* Swords got too high damage values and stats overall and transcendence adds even more to the damage value (Stage 6 Transcendence results in +210% damage increase and +6 Anvil enchantment results in +77 Damage that is multiplied by transcendence stages). Here are Swords/Rapiers:
- Level 315 9* Purple Sword; 366-447 P.Atk; AoE Defence Ratio +3; CON +18; Evasion +45; M.Def +330
- Level 315 9* Orange Sword; 418-511 P.Atk; Max Atk +158; P.Def +245; HP +1837
- Solomeki Level 330 Rapier; 419 P.Atk; STR +22; SPR +30; Large Targets Damage +421; Holy Atk +120; Fencer Skills +2
So yeah any of them get +77 Damage if enhanced to +6 and +210% if transcendence Stage 6:
Purple S: [(366+447)/2+77]+210% = 483 + 1014 = 1497 Damage only from weapon, so yeah 824 damage from STR is almost twice less then purple weapon. And remember it's only +6 Stage 6 weapon, investing more time resources into your weapon results in even more outcome.
+15, Stage 10: [(366+447)/2+275]+550% = 681 + 3748 = 4429 damage from weapon. Yeah not even close.
So what DEX adds to stats and why 50% Crit Chance and not all to DEX ?
Having more Crit % chance results in more often crits right ? Yes and No ) You are playing kMMORPG that means that 50% Crit can deal Always crits. And CON is really useful, especially when you face someone with boosted weapon with over 4k damage on it.
So for current state of the game stats scale too bad to invest in other then CON. And it will be worse and worse for future ranks if nothing changed.
But Swordies got buffed on STR investment with +30% more damage from STR in melee. And yes it will result in 824+30%=1071 damage from STR, but still CON more useful.
Having 314 DEX (300 if Max Pethamon) results in 155 CON (118 invested).
155 CON:
- 155 Block (dative value of Damage that absorbed by the Block)
- HP increase = [155 x 85] = 10075 additional HP
- 155 Critical Resistance, if you curious it is ~20% Critical hit chance reduction for level 330
Other stats of the CON are not that impactful like HP Recovery and Weight limit increase.
So for all classes i would recommend to follow this simple schema for stats distribution:
1) Magic user or Physical user
1.1) If Physical user increase DEX to get Crit chance to 50%, according to formula [50x(42/[Your Base Level])]-[Critical Rate Equips Bonus]+[Average Critical Resistance] = DEX required to get 50% Crit Chance.
Where:
- [Your Base Level] varies for level you are, higher level you are more DEX you need to get % chance.
- [Critical Rate Equips Bonus] Gems, DEX Stat increases (like Max Pethamon or other) and other [Critical Rate] increase equips (like Sissel)
- [Average Critical Resistance] for current State of the game i would calculate 100 coz in PvP most of the classes get 100 or less CON and only few (less then 10) World Bosses got value more then 100.
So yeah having this formula can help you to adjust your Crit % Chance according to changing game content.
Anyway, i see tank with 314 DEX and 155 CON. But this is my own opinion.
Thanks for reading all that )
Forgot about New accessories that add dramatically to stats:
330 Orange 9* Neck; M.Def +122; STR/DEX/INT +40; AoE +1
330 Orange 9* Ring; M.Def +122; P.Def +49; CON +22; Holy/Dark Resist +91
Simply having Neck already compensate Max Pethamonium + 1 Sissel.
22 CON = 1870 HP, so yeah.
All that equip you can get on ET 25~40F so get ready to "hold" all that hordes of monsters. And don't forget to buy [Barrier] scrolls. If game will be alive when you reach level 330 =(
>What for ? [Shooting Star] and +150% damage from [Cassis Crista] attribute ?
Actually over 280+ level give you any damage. Seriously I will explain this later.
>IMHO Not worth, same for Corsair Rank 7, only for [Iron Hook], not worth it.
Like i said this is filler, you pick here whatever you want, just read bottom of my Description.
>But what options we actually have ? For SW1>Pelt2>Rode2>?>?>Murmillo
And this is where you fall and go reroll. Reason? Don't just don't Rode3... never and ever! What you suggest there?
>Corsair C2
Just don't actually all Corsairs go C3 and Shinobi and pray for something good on R9. DWA didn't do anything here.
>Doppelsoeldner C2
Only two thing here I understand and both you have on C1 - Double Pay Earn and Deeds of Valor
>Squire C2
I understand it was a joke.
>Fencer C2
Ok, I am Fencer C3 and Barb C3 now let me explain something. In theory the 280 level, the barb had to supplement my two problems. It was AoE and Slash type damage. It came out a Rank 8 and you know what? ALL barbarians skill does no do ANY damage. So why you wanna waste more points for skills which later didn't give any damage? Montano 15/15 - 1200 dmg, 1 hit skill and Murmillo don't buff this. More than 1 point here mean wasted points only.
About damage increase for shield-type skills. 200% of 0 is still 0. Ok? You want to have asked the damage? First, it must be based on anything.
Example
Targe Smash 5/15 - 594+200%=1188
Targe Smash 15/15 - 1350+200%=2700
When montano still stuck on flat 1200 dmg and you can't raise this damage no matter what you do. This is only to slow your enemy and another CC.
When yes you have your right here about stats alocation. This is from old formula on Rank 7 when 3-stats build was considered at good one. This guide was created before the release Rank 8 as theorybuild and not too much I was wrong, the only thing I did is I got rid Pelt C3 because it is worthless and you can replace it with anything that you like.
I have to sit down and refresh it quite based on experience with new content in game.
Regarding inventory. ET-gear I don't ever consider for anything that you can add to any guides. Say how much you've seen items from Lolopanter that were not gloves or boots? This content is unplayable when it comes to acquiring the equipment.
No, no aggrassion or attack on you. You must understand this.
All Swordies scale badly except Pelta/Rode, due to attributes from the shield.
>>Squire C2
>I understand it was a joke
No, why a joke ? Get money from Weapon Maintenance and [Arrest] is a way better then [Iron Hook] why ? Becaouse: 1) It can stop Boss and tresh for 10 sec; 2) It has -50% DEF attribute. As a Tank i want that skill.
>>Fencer C2
My answer is [Preparation] tank get another skill to increasy survivability and at the same time booster for [Sept Etoiles] multihit [Pierce] skill. And [Pierce] damage type overall, due to all skills in this build could be used with Rapier so why not ?
> About damage increase for shield-type skills. 200% of 0 is still 0. Ok?
Wrong, coz skill damage you got multiplied contains basic damage in it. So it will be: {594+[Basic Attack]} + {594+[Basic Attack]}x2 = Depends on the Weapon
>When montano still stuck on flat 1200 dmg and you can't raise this damage no matter what you do. This is only to slow your enemy and another CC.
Only source of [Slash] damage with average static skill damage, why not ? Coz other shield skills get buffed with helmet. So having 1800 P.Atk results in already good damage from any boosted by helmet skill so my idea is to add damage to [Slash] and [Pierce] type skills.
Umbo Blow lvl 1: {117+1800}+{(117+1800)x4} = 1917 + 7668 = 9585 one hit damage, 19170 full overheats
You can Multiply this damage with [High Guard], [Slithering], [Headbutt] resulting in total 400%+280%+100%+50% = +830% Damage from Umbo and Rim it's a damage past level 280. Also add "Staggered" damage bonus and you get impessive numbers for Tank.
So if you already have that big values on the simple low level skills why wouldn't you have [Slash] type skills leveld up coz IF you want to go Fencer C2 then you can get [Lunge] that will increase damage from [Montano].
And using [Slash] type damage means that you fight vs [Cloth] typde armor (PvE), that will add additional 50% to damage. So having 1800 Basic damage + 869 (level 10) + 100% = 5338 each hit. Why not ?
>This content is unplayable when it comes to acquiring the equipment.
Having no friends/guild and low online makes it hard to play. Also ET 15F is already challenge, getting to F25 or higher requires good coordination and lots of [Barrier] scrolls. thats a pity that they are rare on [EU]Fediman.
>>Squire C2
When each city is flooded by Squire and hard to earn anything. Unless you just don't play, and forever will be in town. Arrest DOES NOT WORK on stronger bosses. Quests? Ok, there's still work but later and more powerful are simply immune to it, you can pick on Rank 7 Squire but C2 is useless.
>>Fencer C2
Oh come on, not again. Preparation? Have you ever used it?
"I use preparation for defense" - Didn't say any Fencer.
[Preparation+Sept Etoiles=Damage / Ok where is your Epee Garde and 600+ crit rate? Wait, we're talking about Murmillo so you do not have C3? Do you realize how pathetic damage without Garde Epee Fencer deal? I met once Fencer / Murmillo, you know what he really regret? Fencer C2. It is only in theory has any synergy. In practice it is weak.
Oct 24th 2016 22:44:10
#20519 (#20521)
@Suzushii
No, no aggrassion or attack on you. You must understand this.
All Swordies scale badly except Pelta/Rode, due to attributes from the shield.
>>Squire C2
>I understand it was a joke
No, why a joke ? Get money from Weapon Maintenance and [Arrest] is a way better then [Iron Hook] why ? Becaouse: 1) It can stop Boss and tresh for 10 sec; 2) It has -50% DEF attribute. As a Tank i want that skill.
>>Fencer C2
My answer is [Preparation] tank get another skill to increasy survivability and at the same time booster for [Sept Etoiles] multihit [Pierce] skill. And [Pierce] damage type overall, due to all skills in this build could be used with Rapier so why not ?
> About damage increase for shield-type skills. 200% of 0 is still 0. Ok?
You have 45 points to give away. The thing you have to give them a hand in all of this foolishness.
Don't try be Jack of all trades master of none or you end like this - https://www.youtube.com/watch?v=eIJwVoefteU
I know very well how we suffer on Fediman sever, sometimes even get party for Saalus is pain.
I probly missed something. i cam to thi link fro "Tank build" forum thread.
> "I use preparation for defense" - Didn't say any Fence
Lol, same here all way down i argue on that Block usability and you point me in the damage multiplier ? Lol.
Yes Block part is useless to Full DEX build. And yes if you have High enough CON you benefit great using [Preparation].
Once again we speac about Tank. Ok? PvE, taking aggro, pulling mobs, tanking boss. All that stuff.
> "Don't try be Jack of all trades master of none or you end like this - https://www.youtube.com/watch?v=eIJwVoefteU"
What a great example of PeltaC3>RodeC3>Murmillo C1 and what he have now ? [Langot] - yeah werry usefull skill, should you knockdown them with any skill you have in arsenal to prevent damage or just get any common rings/neck with +10 Enchance or just sow another class fighting vs [Magic] mobs ? Not exapmle at all. So i have my cons on the build i introduced coz i actually played with it. And i am glad i didn't follow my first decission on max all Pelt/Rode classes.
I got Murmillo 318 with Fencer C2, what are complains of your friend ? I feel fine having tons of defencive-aggressive skills such as [Slithering], [Shield Charge], [Preparation], ["Helmet Passive"], [Falconade] (This one depends on ping wery much so not that usefull on KR )
Damage is fine, at least you can fight through Archers and Catagoons just fine.
Wizards got even more problems for sure if you think that WC3>EC3>WC2 top DPS you are wrong (in scope of Damage Per Second term).
So BEST Rod you can get is [Heart of Glory] (https://tos.neet.tv/items/144110)
Full INT level 330 = 814 = 1144 M.Atk.
Rod Values = +15 Stage 10 = 4810 + 88 from INT on rod and +40 from 315 Necklace = 4938
Total M.Atk = 6082
[Frost Cloud] damage with QC = [(634+6082)x2+321]x20 = 13753x20 = 275060 Damage
Where:
- 634 is a static value of [Frost Cloud] lvl 5
- 6082 your M.Atk
- x2 adiitional 100% damage from Attribute
- +321 level 315 purple dagger (Lionhead Dagger)
- x20 number of hits (yes it deals 1 hit per 0.5 sec)
So how would you calculate DPS ? Simple its damage / by CD.
275060/30 = 9168 DPS +50% From QC you get 13753 DPS
With MAX equps, for example Miko's [Hamaya] have 17914 DPS with +6 Stage 6 330 Orange Mace with no INT invested.
So no, it's not top DPS skill at all, and important part of calculations that there will be less damage due to [Frost Cloud] is [Ice] property and [Hamaya] is [Holy].
In case of [Pole of Agony] it makes this look better but it isnt.
- It deals 1 hit per 0.25 sec
- Dark Element
- It Deals 10+[M.Atk]+[Bonus Damage] every 4-th hit (basicaly deals additional "hit per second")
- LvL 15 is 2574 Damage and 22 Sec duration (88 hits total+22 bonus hits)
Total Damage: {(2574+6082)x2+321}x88+{10+6082+321}x22 = 1551704 + 141086 = 1692790 Damage
DPS: 1692790/120 = 14106 DPS + 50% from QC = 21159 DPS
[Umbo Blow] lvl 6 with all Damage Multipliers and attribute delt after Block (2 hits) (1030%):
- 259 static damage
- +6 Stage 6 9* Sword: 1497 P.Atk + 330 + 40 = 1867 with no STR invested
- 50% Crit Chance
We will calculate DPS according to precise formula to get Crit% chance to the count, so it will be Calculated on 100 hits, where 50 of them will be calculated with critical damage formula [Total Damage]x1.5+[Crit Attack].
So the time for cooldowns will be calculated as [Number of Cooldowns to perform 100 hits] x [Cooldown time]
[Number Cooldowns] = 100/[Overheat]/[Multihit] - 1, coz we need one less colldown to deal exactly 100 hits.
Total Damage: [(259+1867)x1.5x11.3+0]x50+[(259+1867)x11.3]x50 = 1801785 + 1201190 = 3002975 Damage for 100 hits, where 50 them are crits.
DPS: 3002975/{[100/2/2-1]x12} = 3002975/288 = 10427 DPS from one low level skill
+15 Stage 10 Weapon DPS with all damage multipliers calculated with same formula: 22992 DPS
So what i am trying to say, with Rank 8 for all classes DPS will switch and getting Physical classes with High HP/DEF/MDEF factor will be more impactful on gameplay then getting all in Glass Cannon that will die on floor 7 of Earth Tower.
And Full INT Wizard with TOP equip will be less effective then no STR somehow shitty equipped Murmillo from Pelt/Rode. So yeah.
P.S. There is no reason in Getting more damage from other then Pelta/Rode you need increase your Tank powers and varaity of damaging attacks.
Murmillo C2 won't support pierce or slash type skills! Another big problem is fact that "aggro" in this game doesn't exist in way what we know from... WoW for example. Do you think boss will beat on face someone with a weak attack like Murmillo? Or fencer who is now a top DD?
Step back in time to Rank 7 when the "tanks" were worse than Clerics in inflicting damage. Boss moment of time running after the shooters instead to focus on the tank. Plus a large forgetfulness is the equipment. Especially now when Doppels and Murmillo got both boots and gloves as for them with upgrade in Rank 8. An example is here again my Fencer. As I mentioned this is a Barbarian C3. Currently, none of the attacks this class almost do not use. So much so weak that, in principle, only as CC is to anything worth. I don't care whether the armor plate or cloth armor. Pierce attack all day every single one. Waffle with different 50% bonus to attack does not make sense when your personal bonuses will be able to raise or align. Or slightly protrude. I am happy that now even give advice. Just tell me if your C2 fencer is able to cudgel a 100k + in one hit? No? Maybe because that's what created the C3 class to allow this? To specify what the hell you want to be? At the rank of 9 choose Murmillo C2 will make you regret Fencer C2. Hoplite C2 would be better here... really. Do not try to be everything! Because you're done with nothing. If you feel good with your character is great. But let's may be people they stuffed into something you will quickly regret... As I with Barb C3 on Fencer. There is a good chance that the rank 9 will give another attribute that will further strengthen Pelt / Rodo (and consume another 80 million silver) which will continue to operate in PvE. If you do not want to deal damage and be amazing CC ruler... then go do Cyro / Chrono / Sage. It works better.
Oto full petla/rodo/shinobi shielder... Still better is Fencer here?
https://www.youtube.com/watch?v=4jHuqDQ0qyE
It seams that there is some misunderstanding btween us.
- I operate with Numbers and coldblood calculations and you on other side with emotions.
- I show you core synergy of Murmillo with low rank classes, that low ranks skills actually can be a good DPS skill and you show me BarbC3>FenC3 as an example.
Tank build with discent DPS vs Nuker build. How did you even compare this ? Nuke != DPS
Why would you use Barb Skills, they got almost no synergy with Fencer ?
Also one shot combo is sti viable.
> Or fencer who is now a top DD
It's not top DD and if nothing changes it wouldn't be so. It has Nuke potention and this is really useful in PvP, actually it is garant of winning. But if you miss after 2 skills used and what exact multipliers you get from Fencer C3 ?
- If you miss [Epee Garde] > [Preparation] > [Balestra Fente] you need to wait 45 sec to repeat.
- Level 7 [Epee Garde] +210% Critical Multiplier, total Crit multiplier 3.6 and +100% damage from Preparation.
Let's pretend you have 2000 Base attack.
So damage you deal is ({8635+2000}x2x3.6+100)x2 = 153344 Crit Damage.
- From other side [Slithering] > [Headbutt] > [Scutum Hit]
(8081+2000)x2x1.5 = 30243 Non Crit with same parametrs for one hit out of 3 (90k total hits no crit)
(8081+2000)x2x1.5x1.5+100 = 45464 Crit with 50% one hit out of 3 (136k total all crits)
Combo CD: 30 sec
- (259+2000)x11.3 = 25526 Damage from [Umbo Blow] one hit not crit
- 51053 if used after Block not crit
- 38289 Crit
- 63815 if used after Block, one crit other not
- 76578 if used after Block, both crits
And you know what you can do it twice. And more important, after you miss with [Umbo Blow], you can use any of other skills like [Rim Blow] x2, [Scutum Hit] x3, [Targe Smash] x3, [Shield Shoving] x2 and be pretty fine there.
You sould totaly look up on the synergies Murmillo provide in comparison to Fencer C3.
I am out.
I was totaly wrong not taking Rode C3 du to damage type changing of [Shooting Star] was [Slash], now [Strike]
and [Strike] damage multiplier from [High Kick]. Totaly worth it.
Now need to reroll...
Rugal, mechanics. This game works differently than probably most MMO in which we played before.
>Why would you use Barb Skills, they got almost no synergy with Fencer ?
Why it was the most build just a few months ago? Maybe because somehow it has been effective?
>Also one shot combo is sti viable.
Unless you are able to throw at the same time more than 100k damage? Yes. Half of this? No. Even less than half? Why do you need it?
>It's not top DD and if nothing changes it wouldn't be so. It has Nuke potention and this is really useful in PvP, actually it is garant of winning.
It's not like that now all the groups for ET or Libary looking Fencers C3 to party.
Ok, let's start with the fact that all adds to the ability to play. For example, fencer is not mindlessly clicking at random skills. Good DPS rotation is the basis of every thinking DD. This WoW taught in Raids. So "Let's pretend you have 2000 Base attack" is another mistake in logic because Fencer, even half of that will not have at the moment. So the whole calculation again into the trash.
Like a scene (let's call it so even though I think it just for the discussion where we throw each other in arguments which is normal when confronted opinion) had yet even before they have appeared Murmillo in the game. Number of gibberish about pitiful lack of synergy and damage because Rank 7 and the present tense, without taking into account what will happen later. What now? Shield suddenly he can beat enemies and it is hard. What's next? To Rank 10 can safely be Murmillo so shielders can sleep peacefully. How does it work now it is a great chance that it will work later.
>I was totaly wrong not taking Rode C3
Because you're another person who does not read the changes and goes on what was a few weeks / months ago. This game gives the illusion that it is possible to build interesting mixtures of classes. As a result, you end up as - Jack of all trades master of none and you need to reroll... again.
Give me time I would not have slept another night to write this guide correctly and to keep a sense. Now it clearly looks like it was written on his knee after all.
> @Rugal I just skip halfof this calculation about wizards for example.
Why then we even proceed with conversation if you completely bypass all my arguments and calculations ?
> Have you seen anyone with new Libary 315 or even ET 270 weapons? Spoiler - No. So let's be realistic.
>Oct 25th 2016 18:28:21 #20551 (#20554)
@Rugal And of course you forgot about future.
Which one of this tesises is true ?
> Spoiler - No. So let's be realistic.
I saw https://tos.neet.tv/items/204111 in the town +6 Stage 4
> This game works differently than probably most MMO in which we played before.
I don't think that my level of knowledge can be compared to yours. Sorry if speeking too straight.
> Also one shot combo is sti viable.
It's about Fencer
> It's not like that now all the groups for ET or Libary looking Fencers C3 to party.
Coz they are not DPS, it's PvP nuke class. One shot combo is all you have as Fencer C3, DPS from Barb C3 skills is not viable due to too small amount of damage multipliers compared to Dragoon and Murmillo.
> So "Let's pretend you have 2000 Base attack" is another mistake in logic because Fencer, even half of that will not have at the moment. So the whole calculation again into the trash.
Why ? If you have formula and calculate 2 values according to formula you get exact values and you can see % difference between this values, if you change variable in this formula you will get different results but same difference in % value. Cmon, simple logic+math.
>I was totaly wrong not taking Rode C3
Because you're another person who does not read the changes and goes on what was a few weeks / months ago. This game gives the illusion that it is possible to build interesting mixtures of classes. As a result, you end up as - Jack of all trades master of none and you need to reroll... again.
Sorry i don't speek Korean, same for reading. And yes Reroll or just stop playing, or it's +50% loose in dmage modifier but gain in [Preparation] that is totaly awesome in ET.
> Give me time I would not have slept another night to write this guide correctly and to keep a sense. Now it clearly looks like it was written on his knee after all.
Go sleep, skip on guide.
> Go sleep, skip on guide.
You know, I have a suggestion. If you think I'm wrong and this is incredibly plunge-own guide who will counterargument to my proposal. Instead of talking that someone doesn't know how to just show them the correct version. It seems that you are able to do so right?
Less gibberish happens.
Sure.
1) Game Mechanics - https://github.com/vyne1/tos-mechanics
2) Transcendance Guide - https://forum.treeofsavior.com/t/brief-technical-guide-to-transcendence/327824
3) My own design of damage calculation formula taking to account Critical % Rate:
Calculate 100 hits where 1 hit damage will be calculated as crit or non-crit.
e.g. having 37% critical chance (% crit not crit rate, you can find crit % formula in tos mechanics) will result as 37 hits out of 100 will be calculated according to critical damage formula. Then having sum of Critical Damage and Normal damage you can calculate DPS value.
[Total Damage] / ({[Number Of Hits] / [Overheat] / [Multihit] - 1} x [Skill CD/Attack delay])
Where:
[Number Of Hits] = 100 (You can calculate on 10 hits scale but it will not be precise, drom other side increasing amount of hits results in more precise DPS value)
[Overheat] - if skill got it then input it, otherwise it's 1
[Multihit] - if skill is multihit then input here number of hits, otherwise 1
- 1 coz last CD doesn't taken to account (we don't care of last cooldown, coz we already done 100 hits) we can remove it from calculation.
- [Skill CD/Attack Delay] - if calculating DPS of skills then you get skill CD, if basic attack then Class/Weapon specific hit animation (for different classes and weapons it differs).
>@Rugal At first, be realistic.
List Equipment that you think is realistic.
Actually it doesn't contain Critical damage formula in there, Anyway it is:
([Your Critical Rate] - [Enemy Critical Resistance]) x (42/[Your Base Level]) = Critical % Chance
Found it on forum and confirmed values in game.
Wait what ? So you just skip information due to source is not "valid" for you ?
Really. Buy friend nothing to talk to you here
Can you tell me more about stat on this build?
Just 1/1 STR/CON?
what about other stat?
- Does it really worth to take [Gung Ho]? Attack increase seems not scaling at all and become irrelevant later.
Peltasta:
- And what about [Guardian]? (which doesn't stack with [Gung Ho]). Looks situational useful: just Lv1 for attribute +18% evasion. Yet another attack decrease... Please share your thoughts :)
- Think [Langort] deserves 1 point? As it gives access to [Silence]... or there's some downside?
- [High Guardian] boosts damage of [Rim Blow] further, but it requires Lv6. I believe it deserves to be taken.
Rodelero:
- Only one point: as [High Kick] taken for debuff mostly, guess it would be better to throw 4 points from it to [Shield Push]? Just because each bit of damage here will be multiplied by [Cassis Crista] attributes...
[Gung Ho]
- Self buff to do thing like leveling or quest, actually with attribute + Concentrate with attribute allow you to kill someting solo, after all you don't have any usefull skill to damage.
[Guardian]
- At first you must have evasion, that mean you must have a lot of DEX. You don't have so attribute is useless. Actually might be worthy because they on kToS reduce penancy to pATK but after all you should have enough pDEF with plate.
[Langort]
- Swap with Shield Lob it's option.
[High Guardian] for [Rim Blow]
Not really, only one hit do not much damage after all and there are much better skill to invest.
[High Kick]
- You can put only 1/5 and invest point to [Shield Push] for [Cassis Crista] of course this is option too. But actually high kick do some damage because you use this basic in rotation. Option, you can but this isn't necessary.