The Holy Spirit
Created by fabrício.polo on Apr 21st 2017 (Last Updated: Sep 7th 2018).
This is a public build.
8
Hello! If you came to this guide because of the previous Sadhu3 Kabbalist3 guide, you can check it here: The Smart Spirit
The Holy Spirit
-------------------------x-------------------------
"When the night is dark and fear overcomes,
there's a hero coming, to save us all!"
theme music video
Welcome! My name is Wellan (ign), a Silute player that developed a passion for the Sadhu class since the beginning of the game. I always wanted a viable character that could have this class integrated, but before it was kind of a hard task. Now, with the advent of Exorcist, Sadhu could find a place to survive.
I must say that I have zero knowledge of the PvP scenario, so this guide is solely focused on PvE. The core reason of this build is to activate buffs like Transmit Prana and Divine Stigma, then extend them with Meltsis and dish out damage with Exorcist and Sadhu skills.
Hope you enjoy it! Leave your Like if you appreciate this guide and feel free to ask any question, I will do my best to help you out! :)
PS.: this guide is still under construction.
"Who is the one to save the nation crying? Who will lead us to light?"
=================================
1. Pros and Cons
=================================
Pros: 3 full circle classes, which means that it is pretty straight-forward and simple with attributes. Comparing to more popular variations of Exorcist, you will have more mobility, you will not struggle with flying mobs, and will have 2 nice buffs to your party members that are super easy to manage (Aukuras and Divine Stigma). Sadhu will give you Crowd Control and damage increase, Amazing damage in Rubric, and Krivis giving you nice fillers and supportive options. You can even Heal with Aukuras, but with this build you are free from the "Cleric builds always have to heal" syndrom.
Cons: Not a lot of support abilities, compared to other Exorcist variations. Lack of passive damage skills (only Koinonia and Aqua Benedicta, this second having a small duration). Rubric outshines any skill, even other Exorcist ones, so be aware of a nerf that will certainly come soon, so you will not be disappointed when it hit your character. Sadhu damage is only OK, even with Transmit Prana active, so they will be better for Crowd Control only, to gain momentum and mitigate damage.
=================================
2. Status Distribution
=================================
INT - Your damage stat, it increases your Magic Damage. Some people may argue that it is irrelevant once you have a high enhanced weapon with Transcendence stage 10, but until you hit that, this status is your main focus (and even with such powerfull weapon, I would say that INT is still the best attribute you can have).
CON - Responsible for your maximum HP and DEF, add points in here if you want to survive more. I personally recommend either 50 if you just want extra defenses, or 100 if you are concerned with that.
SPR - Responsible for your maximum SP and SP recovery, it also add to the Healing Power attribute. Allocate points here to help you recover your SP with potions. It is not a burden, but you will consume a good ammount of SP, so I recommend 50 points here if you want to consider this status.
Based on these status, you can follow these builds:
- > Full INT
- > 100 CON | Max INT
- > 50 SPR | Max INT
- > 50 CON | 50 SPR | Max INT
- > 100 CON | 50 SPR | Max INT
=================================
3. Skills and Attributes
=================================
About the Enhance attributes: They play a big role on how much damage you will gonna deal, specially with lower rank classes, so they can play alongside Exorcist skills (or R8 classes in general). I personally follow this pattern for my characters in general, you can follow it too if you like:
-> Enhance Lv. 30 - cheap and easy, buy the related enhance attribute as soon as you start using any damage skill
-> Enhance Lv. 50 - buy them alongside your other non-enhance damage attributes. Still cheap and easy to obtain
-> Enhance Lv. 70 - here is where things start to get expensive. Sometimes I do a Lv. 60 checkpoint to all skills before going to 70. Invest here after you have all other non-enhance damage attributes.
-> Enhance Lv. 100 - personally, I think that the money spent here is stupid. But reaching Lv. 100 grants you extra 10% alongside the regular buff. Events that give you Attribute Points tickets will be your best friends here, otherwise you will spend a lot
Attributes Classification for this guide:
♦♦♦ -> Very important, maximize it as soon as you can
♦♦ -> Nice addition to the build, buy after the important ones
♦ -> Not so important, but nice to have, buy when you can


Cleric C1
Look at you, full of ambitions and fed up of dreaming with Laima! So get your Mace and start casting your skills to Dance Dance Revolution!
Cause this is pretty much the only thing you will be doing with these skills at end game content...
Heal (5/5) - Bread and butter for healing yourself when you need. You will also use it for damage during low levels.
Safety Zone (5/5) - Your barrier, nice to use when you have to pop out your spirit, when you reach Sadhu. It will have a very small duration cause you will miss all attributes from C2, so use it when you really need.
Cure (5/5) - Use it to remove lv1 debuffs. Well, who cares about it? Cast it on monsters to deal damage! You will certainly drop this skill later, but will be good for early game.
Attributes:
Heal: Creating Extra ♦♦
Heal: Remove Damage ♦♦♦ (toggle off to deal damage)
Heal: Exclude Summons ♦♦♦
Safety Zone: Increased Range ♦♦
One-handed Blunt Mastery: Healing ♦♦


Krivis C3
Ok, let's face this: all Goddesses suck! I mean, they are venerated and stuff, but when you start to meet them (and therefore saving their asses!), you will see that they have such power and representation, but do little to nothing to change all the Kingdom's situation... so instead of follow the path of passive supporting people (like the Goddesses), we gonna take the front line and start dealing with demons face to face!
Aukuras (15/15) - Summons the holy torch to heal your wounds over time. There is an attribute that changes the torch completely to not heal anymore, but to grant additional fire property damage. This skill is really nice and versatile, but you should save your points for others skills first, then level this one up.
Zaibas (15/15) - Creates a magic circle that deals Lightning property damage to enemies within its area. Very nice damage, specially at full circle and with attributes. Small cooldown allows you to use it quite often. Bread and butter damaging skill.
Divine Stigma (10/10) - Mark random enemies in front of you to deal Fire damage over the time. If the monster is killed, Divine Stigma will grant you a buff that increases STR and INT of you and party members. It also makes the enemy suffer more damage from Zaibas, so nice combo with both skills, with a very yummy buff!
Meltsis (5/5) - increase all buffs duration from you and your party members within its area. This is the reason you go Krivis C3, to mainly use this skill to extend Sadhu's Transmit Prana and Divine Stigma buff. Consumes 5 Holy Powder each use (buy with Krivis or Priest Masters).
Attributes:
Weapon Swap ♦
Aukuras: Enhance ♦♦♦
Aukuras: Fire Property Resistance ♦
Aukuras: Goddess of Fire ♦♦♦ (toggle off to heal)
Divine Stigma: Defeat Evil ♦♦♦
Divine Stigma: Duration ♦♦♦
Divine Stigma: Enhance ♦♦♦
Zaibas: Enhance ♦♦♦
Zaibas: Splash ♦♦♦


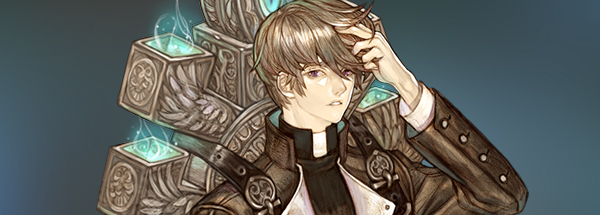
Sadhu C3
Now, to better defeat evil spirits, let's learn how to deal with your own spirit! As I stated already, this is the class that I love and the reason why this guide exists. I love this class since beta and hate IMC since first nerfs. Anyway, now your Prana essence will let you Crowd Control monsters and deal damage at the same time! Awesome <3
Out of Body (13/15) - pop out your spirit and hit things from far apart! I suggest to get only 1 point, so you can use ABE, and then get more points later when other skills are maxed out, cause it will only increase the range that you spirit can travel away. Use once to pop out, use again to bring it back in. No relevant damage, specially at end game, so don't bother too much with auto attacking.
Prakriti (1/1) - makes your body travel to where your spirit is located. Main use: to heal (with attribute) or repositioning.
Astral Body Explosion (15/15) - What is the only (and coolest) thing you can do with your spirit? EXPLODE IT, OF COURSE! This skill will explode your spiritual body to deal damage, but also will deal residual damage for a few seconds. Use it, love it (until you reach Exorcist). The knockdown attribute will be a great help to disturb monsters, so use it as much as you can, but when you are in a party you might need to toggle off for better mobbing.
Vashita Siddhi (1/15) - creates an aura around your spirit to reduces enemies atributes. It is a channeling skill (you have to keep pressing skill button), and it doesn't have a real usage. You can skip it for more OoB, or get it for the cool animation.
Possession (10/10) - another channeling skill, but this time you will deal damage instead! This skill will lock monsters during its duration and deal damage. Perfect for that moment when your party is surrounded by monsters, so you can hold damage for some seconds.
Transmit Prana (5/5) - now shit got real. This buff is amazing! What it does is it will give additional Psychokinesis property damage to any skill that you use (and a really nice ammount of it!) and, if the skill is from this property already (which all Sadhu skills are), then it will give 150% of this additional property damage. This buff makes a lot of other skills even more stronger, but makes Sadhu's own skills useful at the end game, so make sure that you use them while Transmit Prana is on. TP + Meltsis will be your best friend forerer now.
Attributes:
Astral Body Explosion: Enhance ♦♦♦
Astral Body Explosion: Knockdown ♦♦♦ (toggle off during party,unless you need crowd control)
Out of Body: Evasion ♦♦
Possession: Enhance ♦♦♦
Prakriti: HP Recorevy ♦♦♦


Exorcist C2
I wish Aqua Benedicta had this animation. And the white outfit sucks!
Now let's kick some demon asses! Hoo-ray! Exorcist is stupidly strong against any monster, even more against demons and dark property. Rubric is extremely powerful, to the point that even his own kit is outshined by it. But overall Exorcist is a very complete class with superb damage cycle and nice support options. Now get your Bible, your silly little spirit popper, and make your holy beam of destruction shine!
Rubric (10/10) - this is the first thing that you have to care about. Really. As soon as you reach Exorcist, throw all your points here and pleasure yourself with your beam of death. I mean... sacred beam, right? Honestly, save all the other C1 points to use when you reach C2, so you can max out Rubric faster. NOTE: there is a bug where if one Rubric ovelap another, one (or both) of them will not proccess all hits properly. Be aware of that, as Exorcist is really popular.
Entity (3/10) - it reveals hidden enemies and deal damage to them. With attribute, you can deal 50% damage to any anemy on sight. Nice spammable option to lure monsters, you can get 1 point and then finish with the last points of the circle.
Aqua Benedicta (10/10) - throw your holy water in that freaking demon face! Hamaya's old brother (get it? cause the animation is the same... but the color is blue...) deals really nice damage, but keep in mind that it doesn't affect flying mobs (boss is fine). Consumes 1 Holy Water (from Exorcist or Priest Master).
Engkrateia (1/10) - IMC RLY? 3 freaking seconds???? Use this skill with attribute (to extend it to 6s) when you see that the boss will cast that knockdown skill, so you will be immune to it. It has nice damage reduction, but with this short duration, there is no reason to invest more points.
Gregorate (1/5) - this skill removes lv.2 debuffs and deal damage on enemies around you based on how many debuffs were removed (counting your party friends). I personally use it only when a debuff is active, so I can remove it and deal damage at the same time (use it during that Lv.6 Challenge Mode with your friends debuffed by Elite monsters... guaranteed satisfaction!).
Koinonia (5/5) - this is a party skill only, for 3 or more people. "Link" your friends and any monster inside this area wil take holy damage. At first, you might not like it because there is no usage on solo play, but it is really nice passive damage to use with party, and if there are at least 3 Clerics, the damage is increased. It woth points, maybe even when C3 arrive.
-> Rank 10: testing out C3 during Rank Reset period, but I will probably go with +5 at Rubric, Aqua Benedicta and Katadikazo. Waiting for simulator update.
Attributes:
Rubric: Enhance ♦♦♦
Rubric: Propagate ♦♦♦
Rubric: Speed Reading ♦♦♦
Entity: Enhance ♦♦
Entity: Divine Impact ♦♦♦
Aqua Benedicta: Enhance ♦♦♦
Aqua Benedicta: Last Drop ♦♦♦
Engkrateia: Patience ♦♦♦
Gregorate: Enhance ♦
Gregorate: Louder ♦♦
Koinonia: Enhance ♦♦♦
=================================
3. Cards
=================================
Please refrain to this guide to have access to all card effects, and also where to obtain the ones that I will suggest here. Guide - All Card Effects
Red Cards: Use 3 of the same card to have better results, mixing them will not be a great idea.
-> Chapparition Card - +% Magic Attack for 6 seconds when using SP potion. Common card for DPS classes, use it to have a nice increase in damage when using potion.
-> Moa Card - +% damage against devil type monsters. Cheap option to have the Chapparition effect always on for Devil type monsters.
Blue Cards: You can mix them to reflect your defenses situation, so you can increase more of what you are lacking. You can use 3 of the same too.
-> Zaura Card - +% Physical Defense. Good if you are lacking it in general, as regular attacks from monsters are mostly physical.
-> Nuaele Card - +% Magic Defense. Good if you are lacking it. Normally boss skills are magical and very strong.
-> Armaos Card - +10% chance to create a shield for 10s. This is a good option if your defenses are already solid, so you can have an extra layer of protection.
Green Cards: these ones will increase your base stats. Use 3 of the same to have significant results.
-> Pyroego Card - Increase INT. Good for extra damage.
-> Blut Card - Increase CON. Good for extra defenses.
Purple Cards: these are utility. Not an useful range of options, so I will give you 4 and you pick what you prefer.
-> Yeti Card - +HP based on card level. More as a filler or if you think you are lacking on HP.
-> Specter Monarch Card - +% chance of recovering 5% SP when defeating dark property enemies. Good for SP refilling, as Dark is the property you will likely kill first than others on your party.
-> Gazing Golem - +% chance of using Lv. 1 Pain Barrier. Good if you think you are struggling with knockdown, but you have Engkrateia and Safety Zone for that, if you time them well.
-> Canceril Card - +% chance of recovering 2% HP when hit by Medium-sized monsters. Good if you want another source of HP recovery. You need more than 1 card if your HP is somewhat less than 40k, otherwise the effect will not worth.
"We are the martyrs, we are the Sun. We fight the darkness 'till the demon's gone"
To be done - Equipment, Leveling, link to unlock quest and what to expect with C3 and R10, showcasing videos
The Holy Spirit
-------------------------x-------------------------
"When the night is dark and fear overcomes,
there's a hero coming, to save us all!"
theme music video
Welcome! My name is Wellan (ign), a Silute player that developed a passion for the Sadhu class since the beginning of the game. I always wanted a viable character that could have this class integrated, but before it was kind of a hard task. Now, with the advent of Exorcist, Sadhu could find a place to survive.
I must say that I have zero knowledge of the PvP scenario, so this guide is solely focused on PvE. The core reason of this build is to activate buffs like Transmit Prana and Divine Stigma, then extend them with Meltsis and dish out damage with Exorcist and Sadhu skills.
Hope you enjoy it! Leave your Like if you appreciate this guide and feel free to ask any question, I will do my best to help you out! :)
PS.: this guide is still under construction.
"Who is the one to save the nation crying? Who will lead us to light?"
=================================
1. Pros and Cons
=================================
Pros: 3 full circle classes, which means that it is pretty straight-forward and simple with attributes. Comparing to more popular variations of Exorcist, you will have more mobility, you will not struggle with flying mobs, and will have 2 nice buffs to your party members that are super easy to manage (Aukuras and Divine Stigma). Sadhu will give you Crowd Control and damage increase, Amazing damage in Rubric, and Krivis giving you nice fillers and supportive options. You can even Heal with Aukuras, but with this build you are free from the "Cleric builds always have to heal" syndrom.
Cons: Not a lot of support abilities, compared to other Exorcist variations. Lack of passive damage skills (only Koinonia and Aqua Benedicta, this second having a small duration). Rubric outshines any skill, even other Exorcist ones, so be aware of a nerf that will certainly come soon, so you will not be disappointed when it hit your character. Sadhu damage is only OK, even with Transmit Prana active, so they will be better for Crowd Control only, to gain momentum and mitigate damage.
=================================
2. Status Distribution
=================================
INT - Your damage stat, it increases your Magic Damage. Some people may argue that it is irrelevant once you have a high enhanced weapon with Transcendence stage 10, but until you hit that, this status is your main focus (and even with such powerfull weapon, I would say that INT is still the best attribute you can have).
CON - Responsible for your maximum HP and DEF, add points in here if you want to survive more. I personally recommend either 50 if you just want extra defenses, or 100 if you are concerned with that.
SPR - Responsible for your maximum SP and SP recovery, it also add to the Healing Power attribute. Allocate points here to help you recover your SP with potions. It is not a burden, but you will consume a good ammount of SP, so I recommend 50 points here if you want to consider this status.
Based on these status, you can follow these builds:
- > Full INT
- > 100 CON | Max INT
- > 50 SPR | Max INT
- > 50 CON | 50 SPR | Max INT
- > 100 CON | 50 SPR | Max INT
=================================
3. Skills and Attributes
=================================
About the Enhance attributes: They play a big role on how much damage you will gonna deal, specially with lower rank classes, so they can play alongside Exorcist skills (or R8 classes in general). I personally follow this pattern for my characters in general, you can follow it too if you like:
-> Enhance Lv. 30 - cheap and easy, buy the related enhance attribute as soon as you start using any damage skill
-> Enhance Lv. 50 - buy them alongside your other non-enhance damage attributes. Still cheap and easy to obtain
-> Enhance Lv. 70 - here is where things start to get expensive. Sometimes I do a Lv. 60 checkpoint to all skills before going to 70. Invest here after you have all other non-enhance damage attributes.
-> Enhance Lv. 100 - personally, I think that the money spent here is stupid. But reaching Lv. 100 grants you extra 10% alongside the regular buff. Events that give you Attribute Points tickets will be your best friends here, otherwise you will spend a lot
Attributes Classification for this guide:
♦♦♦ -> Very important, maximize it as soon as you can
♦♦ -> Nice addition to the build, buy after the important ones
♦ -> Not so important, but nice to have, buy when you can
Cleric C1
Look at you, full of ambitions and fed up of dreaming with Laima! So get your Mace and start casting your skills to Dance Dance Revolution!
Cause this is pretty much the only thing you will be doing with these skills at end game content...
Heal (5/5) - Bread and butter for healing yourself when you need. You will also use it for damage during low levels.
Safety Zone (5/5) - Your barrier, nice to use when you have to pop out your spirit, when you reach Sadhu. It will have a very small duration cause you will miss all attributes from C2, so use it when you really need.
Cure (5/5) - Use it to remove lv1 debuffs. Well, who cares about it? Cast it on monsters to deal damage! You will certainly drop this skill later, but will be good for early game.
Attributes:
Heal: Creating Extra ♦♦
Heal: Remove Damage ♦♦♦ (toggle off to deal damage)
Heal: Exclude Summons ♦♦♦
Safety Zone: Increased Range ♦♦
One-handed Blunt Mastery: Healing ♦♦
Krivis C3
Ok, let's face this: all Goddesses suck! I mean, they are venerated and stuff, but when you start to meet them (and therefore saving their asses!), you will see that they have such power and representation, but do little to nothing to change all the Kingdom's situation... so instead of follow the path of passive supporting people (like the Goddesses), we gonna take the front line and start dealing with demons face to face!
Aukuras (15/15) - Summons the holy torch to heal your wounds over time. There is an attribute that changes the torch completely to not heal anymore, but to grant additional fire property damage. This skill is really nice and versatile, but you should save your points for others skills first, then level this one up.
Zaibas (15/15) - Creates a magic circle that deals Lightning property damage to enemies within its area. Very nice damage, specially at full circle and with attributes. Small cooldown allows you to use it quite often. Bread and butter damaging skill.
Divine Stigma (10/10) - Mark random enemies in front of you to deal Fire damage over the time. If the monster is killed, Divine Stigma will grant you a buff that increases STR and INT of you and party members. It also makes the enemy suffer more damage from Zaibas, so nice combo with both skills, with a very yummy buff!
Meltsis (5/5) - increase all buffs duration from you and your party members within its area. This is the reason you go Krivis C3, to mainly use this skill to extend Sadhu's Transmit Prana and Divine Stigma buff. Consumes 5 Holy Powder each use (buy with Krivis or Priest Masters).
Attributes:
Weapon Swap ♦
Aukuras: Enhance ♦♦♦
Aukuras: Fire Property Resistance ♦
Aukuras: Goddess of Fire ♦♦♦ (toggle off to heal)
Divine Stigma: Defeat Evil ♦♦♦
Divine Stigma: Duration ♦♦♦
Divine Stigma: Enhance ♦♦♦
Zaibas: Enhance ♦♦♦
Zaibas: Splash ♦♦♦
Sadhu C3
Now, to better defeat evil spirits, let's learn how to deal with your own spirit! As I stated already, this is the class that I love and the reason why this guide exists. I love this class since beta and hate IMC since first nerfs. Anyway, now your Prana essence will let you Crowd Control monsters and deal damage at the same time! Awesome <3
Out of Body (13/15) - pop out your spirit and hit things from far apart! I suggest to get only 1 point, so you can use ABE, and then get more points later when other skills are maxed out, cause it will only increase the range that you spirit can travel away. Use once to pop out, use again to bring it back in. No relevant damage, specially at end game, so don't bother too much with auto attacking.
Prakriti (1/1) - makes your body travel to where your spirit is located. Main use: to heal (with attribute) or repositioning.
Astral Body Explosion (15/15) - What is the only (and coolest) thing you can do with your spirit? EXPLODE IT, OF COURSE! This skill will explode your spiritual body to deal damage, but also will deal residual damage for a few seconds. Use it, love it (until you reach Exorcist). The knockdown attribute will be a great help to disturb monsters, so use it as much as you can, but when you are in a party you might need to toggle off for better mobbing.
Vashita Siddhi (1/15) - creates an aura around your spirit to reduces enemies atributes. It is a channeling skill (you have to keep pressing skill button), and it doesn't have a real usage. You can skip it for more OoB, or get it for the cool animation.
Possession (10/10) - another channeling skill, but this time you will deal damage instead! This skill will lock monsters during its duration and deal damage. Perfect for that moment when your party is surrounded by monsters, so you can hold damage for some seconds.
Transmit Prana (5/5) - now shit got real. This buff is amazing! What it does is it will give additional Psychokinesis property damage to any skill that you use (and a really nice ammount of it!) and, if the skill is from this property already (which all Sadhu skills are), then it will give 150% of this additional property damage. This buff makes a lot of other skills even more stronger, but makes Sadhu's own skills useful at the end game, so make sure that you use them while Transmit Prana is on. TP + Meltsis will be your best friend forerer now.
Attributes:
Astral Body Explosion: Enhance ♦♦♦
Astral Body Explosion: Knockdown ♦♦♦ (toggle off during party,unless you need crowd control)
Out of Body: Evasion ♦♦
Possession: Enhance ♦♦♦
Prakriti: HP Recorevy ♦♦♦
Exorcist C2
I wish Aqua Benedicta had this animation. And the white outfit sucks!
Now let's kick some demon asses! Hoo-ray! Exorcist is stupidly strong against any monster, even more against demons and dark property. Rubric is extremely powerful, to the point that even his own kit is outshined by it. But overall Exorcist is a very complete class with superb damage cycle and nice support options. Now get your Bible, your silly little spirit popper, and make your holy beam of destruction shine!
Rubric (10/10) - this is the first thing that you have to care about. Really. As soon as you reach Exorcist, throw all your points here and pleasure yourself with your beam of death. I mean... sacred beam, right? Honestly, save all the other C1 points to use when you reach C2, so you can max out Rubric faster. NOTE: there is a bug where if one Rubric ovelap another, one (or both) of them will not proccess all hits properly. Be aware of that, as Exorcist is really popular.
Entity (3/10) - it reveals hidden enemies and deal damage to them. With attribute, you can deal 50% damage to any anemy on sight. Nice spammable option to lure monsters, you can get 1 point and then finish with the last points of the circle.
Aqua Benedicta (10/10) - throw your holy water in that freaking demon face! Hamaya's old brother (get it? cause the animation is the same... but the color is blue...) deals really nice damage, but keep in mind that it doesn't affect flying mobs (boss is fine). Consumes 1 Holy Water (from Exorcist or Priest Master).
Engkrateia (1/10) - IMC RLY? 3 freaking seconds???? Use this skill with attribute (to extend it to 6s) when you see that the boss will cast that knockdown skill, so you will be immune to it. It has nice damage reduction, but with this short duration, there is no reason to invest more points.
Gregorate (1/5) - this skill removes lv.2 debuffs and deal damage on enemies around you based on how many debuffs were removed (counting your party friends). I personally use it only when a debuff is active, so I can remove it and deal damage at the same time (use it during that Lv.6 Challenge Mode with your friends debuffed by Elite monsters... guaranteed satisfaction!).
Koinonia (5/5) - this is a party skill only, for 3 or more people. "Link" your friends and any monster inside this area wil take holy damage. At first, you might not like it because there is no usage on solo play, but it is really nice passive damage to use with party, and if there are at least 3 Clerics, the damage is increased. It woth points, maybe even when C3 arrive.
-> Rank 10: testing out C3 during Rank Reset period, but I will probably go with +5 at Rubric, Aqua Benedicta and Katadikazo. Waiting for simulator update.
Attributes:
Rubric: Enhance ♦♦♦
Rubric: Propagate ♦♦♦
Rubric: Speed Reading ♦♦♦
Entity: Enhance ♦♦
Entity: Divine Impact ♦♦♦
Aqua Benedicta: Enhance ♦♦♦
Aqua Benedicta: Last Drop ♦♦♦
Engkrateia: Patience ♦♦♦
Gregorate: Enhance ♦
Gregorate: Louder ♦♦
Koinonia: Enhance ♦♦♦
=================================
3. Cards
=================================
Please refrain to this guide to have access to all card effects, and also where to obtain the ones that I will suggest here. Guide - All Card Effects
Red Cards: Use 3 of the same card to have better results, mixing them will not be a great idea.
-> Chapparition Card - +% Magic Attack for 6 seconds when using SP potion. Common card for DPS classes, use it to have a nice increase in damage when using potion.
-> Moa Card - +% damage against devil type monsters. Cheap option to have the Chapparition effect always on for Devil type monsters.
Blue Cards: You can mix them to reflect your defenses situation, so you can increase more of what you are lacking. You can use 3 of the same too.
-> Zaura Card - +% Physical Defense. Good if you are lacking it in general, as regular attacks from monsters are mostly physical.
-> Nuaele Card - +% Magic Defense. Good if you are lacking it. Normally boss skills are magical and very strong.
-> Armaos Card - +10% chance to create a shield for 10s. This is a good option if your defenses are already solid, so you can have an extra layer of protection.
Green Cards: these ones will increase your base stats. Use 3 of the same to have significant results.
-> Pyroego Card - Increase INT. Good for extra damage.
-> Blut Card - Increase CON. Good for extra defenses.
Purple Cards: these are utility. Not an useful range of options, so I will give you 4 and you pick what you prefer.
-> Yeti Card - +HP based on card level. More as a filler or if you think you are lacking on HP.
-> Specter Monarch Card - +% chance of recovering 5% SP when defeating dark property enemies. Good for SP refilling, as Dark is the property you will likely kill first than others on your party.
-> Gazing Golem - +% chance of using Lv. 1 Pain Barrier. Good if you think you are struggling with knockdown, but you have Engkrateia and Safety Zone for that, if you time them well.
-> Canceril Card - +% chance of recovering 2% HP when hit by Medium-sized monsters. Good if you want another source of HP recovery. You need more than 1 card if your HP is somewhat less than 40k, otherwise the effect will not worth.
"We are the martyrs, we are the Sun. We fight the darkness 'till the demon's gone"
To be done - Equipment, Leveling, link to unlock quest and what to expect with C3 and R10, showcasing videos
Rank 1
 Cleric |
5 / 5 2 Heal: Enhance Type: Passive * Increases the damage and heal factor of [Heal] by 0.5% per attribute level * +10% added bonus at maximum level Cleric 1st Circle required Heal: Creating Extra Type: Active * Adds a 2% chance per attribute level of being automatically healed when using [Heal] * Increases SP consumption by 20% Cleric 1st Circle required Heal: Remove Damage Type: Active * [Heal] will not inflict damage nor react to enemies * Increases SP consumption by 10% Cleric 1st Circle required Heal: Open Sanctuary Type: Active * Extends the effects of [Heal] to neutral characters. Cleric 1st Circle required Heal: Exclude Summons Type: Active * Keeps [Heal] effects from applying to summons. Cleric 1st Circle required Heal: Linger Type: Active * Applies a buff that continuously restores the HP of allies healed with Heal or Mass Heal * The buff lasts 10 sec and restores HP in a value equal to [attribute level x 5]% of your Healing stat * Increases SP consumption by 30% Cleric 3rd Circle required Heal [Magic] - [Holy] Creates a magic circle in front of you, healing allies or damaging enemies. Does not affect airborne enemies. Amount of HP recovered depends on the target's maximum HP. Recovery increases with the casting character's INT and SPR. Level 5: Attack 228% Heal factor 228% Magic circle duration 40 sec No. of heal circles 5 SP: 38 Type: Magic / Buff Cooldown: 22s Element: 5 / 5 Cure: Enhance Type: Passive * Increases the damage dealt on an enemy with [Cure] by 0.5% per attribute level * +10% added damage at maximum level Cleric 1st Circle required Cure: Damage Interval Type: Active * Decreases the interval of [Cure]'s magic circle by 0.2 seconds * Increases SP consumption by 20% Cleric 2nd Circle required Cure [Magic] - [Holy] Creates a magic circle that removes a Lv1 status ailment from allies or inflicts damage to enemies. Does not affect airborne enemies. Level 5: 0.4 second attack 103% No. of Hits: 18 Magic Circle Duration: 10 seconds SP: 42 Type: Magic / Buff Cooldown: 27s Element: 5 / 5 Safety Zone: Increased Range Type: Active * Increases range applied by [Safety Zone] to 15 * Increases SP consumption by 80% Cleric 1st Circle required Safety Zone: Block Count Type: Active * Increases block count of [Safety Zone] by 1 per attribute level * Increases SP consumption by 10% Cleric 2nd Circle required Safety Zone Creates a magic circle that blocks incoming attacks. Level 5: Blocks: 10 times Magic Circle Duration: 20 seconds SP: 47 Type: Magic / Buff Cooldown: 48s Element: |
|
Rank 2
Krivis |
5 / 5 2 Zaibas: Enhance Type: Passive * Increases the damage dealt on an enemy with [Zaibas] by 0.5% per attribute level * +10% added damage at maximum level Krivis 1st Circle required Zaibas: Splash Type: Active * [Zaibas] deals damage to multiple enemies * Max. targets: 7 * Total count is maintained * Increases SP consumption by 30% Krivis 2nd Circle required Zaibas [Magic] - [Lightning] Creates a magic circle that calls down bolts of lightning on an enemy using the God of Thunder's power. Level 5: 0.3 second attack 82% No. of Hits: 9 Magic Circle Duration: 30 seconds SP: 66 Type: Magic / Attack Cooldown: 20s Element: |
Rank 3
 Krivis |
10 / 10 Aukuras: Enhance Type: Passive * Increases the heal factor of [Aukuras] by 0.5% per attribute level * +10% added bonus at maximum level Krivis 1st Circle required Aukuras: Fire Property Resistance Type: Active * Increases Fire property resistance by 14 per attribute level when [Aukuras] is active * Increases SP consumption by 10% Krivis 1st Circle required Aukuras: Goddess of Fire Type: Active * Ally magic attacks within range of [Aukuras] deal additional Fire property damage * Decreases torch duration by 10 seconds * Eliminates the amount of HP recovered * Increases SP consumption by 20% * Decreases cooldown by 30 seconds Krivis 2nd Circle required Aukuras Summons a holy torch, constantly restoring the HP of nearby allies while reducing the accuracy of nearby enemies. While nearby the torch, the duration of harmful effects will constantly be reduced. Level 10: Heal factor 66% Torch duration 30 sec Add. Fire property damage per magic attack 0 SP: 109 Type: Magic / Buff Cooldown: 60s Element: 10 / 10 2 Zaibas: Enhance Type: Passive * Increases the damage dealt on an enemy with [Zaibas] by 0.5% per attribute level * +10% added damage at maximum level Krivis 1st Circle required Zaibas: Splash Type: Active * [Zaibas] deals damage to multiple enemies * Max. targets: 7 * Total count is maintained * Increases SP consumption by 30% Krivis 2nd Circle required Zaibas [Magic] - [Lightning] Creates a magic circle that calls down bolts of lightning on an enemy using the God of Thunder's power. Level 10: 0.3 second attack 82% No. of Hits: 14 Magic Circle Duration: 30 seconds SP: 111 Type: Magic / Attack Cooldown: 20s Element: 5 / 5 Divine Stigma: Duration Type: Active * Increases duration of [Divine Stigma] by 6 seconds per attribute level Increases SP consumption by 20% Krivis 2nd Circle required Divine Stigma: Defeat Devil Type: Active * Increases [Divine Stigma] damage against Devil-type targets by 10% per attribute level * Increases SP consumption by 20% Requires Divine Stigma Level 10 Divine Stigma: Enhance Type: Passive * Increases the damage dealt on an enemy with [Divine Stigma] by 0.5% per attribute level * +10% added damage at maximum level Krivis 2nd Circle required Divine Stigma Engrave a stigma on the enemy and deal Fire magic damage. The stigmatized enemy takes 1.5 times damage from Zaibas, and increases the STR and INT of allies temporarily when defeated. Level 5: Attack: 186% STR, INT: +47 Effect Duration: 0 seconds Stigma Duration: 15 seconds No. of Targets: 5 SP: 60 Type: Magic / Attack Cooldown: 30s Element: |
Rank 4
 Krivis |
15 / 15 Aukuras: Enhance Type: Passive * Increases the heal factor of [Aukuras] by 0.5% per attribute level * +10% added bonus at maximum level Krivis 1st Circle required Aukuras: Fire Property Resistance Type: Active * Increases Fire property resistance by 14 per attribute level when [Aukuras] is active * Increases SP consumption by 10% Krivis 1st Circle required Aukuras: Goddess of Fire Type: Active * Ally magic attacks within range of [Aukuras] deal additional Fire property damage * Decreases torch duration by 10 seconds * Eliminates the amount of HP recovered * Increases SP consumption by 20% * Decreases cooldown by 30 seconds Krivis 2nd Circle required Aukuras Summons a holy torch, constantly restoring the HP of nearby allies while reducing the accuracy of nearby enemies. While nearby the torch, the duration of harmful effects will constantly be reduced. Level 15: Heal factor 86% Torch duration 30 sec Add. Fire property damage per magic attack 0 SP: 154 Type: Magic / Buff Cooldown: 60s Element: 15 / 15 2 Zaibas: Enhance Type: Passive * Increases the damage dealt on an enemy with [Zaibas] by 0.5% per attribute level * +10% added damage at maximum level Krivis 1st Circle required Zaibas: Splash Type: Active * [Zaibas] deals damage to multiple enemies * Max. targets: 7 * Total count is maintained * Increases SP consumption by 30% Krivis 2nd Circle required Zaibas [Magic] - [Lightning] Creates a magic circle that calls down bolts of lightning on an enemy using the God of Thunder's power. Level 15: 0.3 second attack 82% No. of Hits: 19 Magic Circle Duration: 30 seconds SP: 156 Type: Magic / Attack Cooldown: 20s Element: 10 / 10 Divine Stigma: Duration Type: Active * Increases duration of [Divine Stigma] by 6 seconds per attribute level Increases SP consumption by 20% Krivis 2nd Circle required Divine Stigma: Defeat Devil Type: Active * Increases [Divine Stigma] damage against Devil-type targets by 10% per attribute level * Increases SP consumption by 20% Requires Divine Stigma Level 10 Divine Stigma: Enhance Type: Passive * Increases the damage dealt on an enemy with [Divine Stigma] by 0.5% per attribute level * +10% added damage at maximum level Krivis 2nd Circle required Divine Stigma Engrave a stigma on the enemy and deal Fire magic damage. The stigmatized enemy takes 1.5 times damage from Zaibas, and increases the STR and INT of allies temporarily when defeated. Level 10: Attack: 237% STR, INT: +87 Effect Duration: 0 seconds Stigma Duration: 15 seconds No. of Targets: 5 SP: 102 Type: Magic / Attack Cooldown: 30s Element: 5 / 5 Melstis Creates a magic circle that extends the duration of beneficial effects on you and your party members. The amount of time that effects are extended by will not surpass 20 seconds. Does not apply to invincibility effects. Level 5: Duration +100% Consumes Holy Powder x5 SP: 86 Type: Magic / Buff Cooldown: 60s |
|
Rank 5
Sadhu |
1 / 5 Body Basic Attack: Enhance Type: Passive * Increases the damage dealt on an enemy with [Body Bask Attack] by 0.5% per attribute level * +10% added damage at maximum level Sadhu 1st Circle required Out of Body: Evasion Type: Active * Increases the body's evasion by 10 per attribute level when [Out of Body] is active Sadhu 1st Circle required Out of Body Basic Attack: Enemy Defense Weakened Type: Active * Decreases the enemy's physical defense by 10% with a chance of 10% per attribute level when using a basic attack during Out of Body * Unable to turn ON/OFF during Out of Body Sadhu 1st Circle required Out of Body Move your spirit out of the body. The spirit can only move near the body. Level 1: Spirit's Moving Range: 150 SP: 0 Type: Magic / Attack Cooldown: 0s 1 / 1 Prakriti: HP Recovery Type: Active * Recovers HP equal to 5% of maximum HP per attribute level when using [Prakriti] * Increases SP consumption by 30% Sadhu 2nd Circle required Prakriti Move body to the spirit to unite again. Can only be used when spirit is out of body. Level 1: Movement Time 0.5 ~ 1 second SP: 24 Type: Magic / Attack Cooldown: 9s 5 / 5 Astral Body Explosion: Enhance Type: Passive * Increases the damage dealt on an enemy with [Astral Body Explosion] by 0.5% per attribute level * +10% added damage at maximum level Sadhu 1st Circle required Astral Body Explosion: Knockdown Type: Active * Enemies hit with [Astral Body Explosion] are knocked down * Increases SP consumption by 10% Sadhu 1st Circle required Astral Body Explosion [Magic] - [Psychokinesis] Inflict damage on nearby enemies by separating your soul from your body to cause an explosion. Attacked enemies receive a percentage of Psychokinesis magic damage for 5 seconds. Level 5: Attack: 1038% SP: 103 Type: Magic / Attack Cooldown: 30s Element: |
|
Rank 6
Sadhu |
10 / 10 Astral Body Explosion: Enhance Type: Passive * Increases the damage dealt on an enemy with [Astral Body Explosion] by 0.5% per attribute level * +10% added damage at maximum level Sadhu 1st Circle required Astral Body Explosion: Knockdown Type: Active * Enemies hit with [Astral Body Explosion] are knocked down * Increases SP consumption by 10% Sadhu 1st Circle required Astral Body Explosion [Magic] - [Psychokinesis] Inflict damage on nearby enemies by separating your soul from your body to cause an explosion. Attacked enemies receive a percentage of Psychokinesis magic damage for 5 seconds. Level 10: Attack: 1272% SP: 165 Type: Magic / Attack Cooldown: 30s Element: 5 / 5 Possession: Enhance Type: Passive * Increases the damage dealt on an enemy with [Possession] by 0.5% per attribute level * +10% added damage at maximum level Sadhu 2nd Circle required Possession [Magic] - [Psychokinesis] Bind enemy to stop its movement and inflict damage. Level 5: 0.3 second attack 167% Targets: 9 Maximum Duration: 6.5 seconds SP: 86 Type: Magic / Attack Cooldown: 20s Element: |
|
Rank 7
Sadhu |
13 / 15 Body Basic Attack: Enhance Type: Passive * Increases the damage dealt on an enemy with [Body Bask Attack] by 0.5% per attribute level * +10% added damage at maximum level Sadhu 1st Circle required Out of Body: Evasion Type: Active * Increases the body's evasion by 10 per attribute level when [Out of Body] is active Sadhu 1st Circle required Out of Body Basic Attack: Enemy Defense Weakened Type: Active * Decreases the enemy's physical defense by 10% with a chance of 10% per attribute level when using a basic attack during Out of Body * Unable to turn ON/OFF during Out of Body Sadhu 1st Circle required Out of Body Move your spirit out of the body. The spirit can only move near the body. Level 13: Spirit's Moving Range: 270 SP: 0 Type: Magic / Attack Cooldown: 0s 15 / 15 Astral Body Explosion: Enhance Type: Passive * Increases the damage dealt on an enemy with [Astral Body Explosion] by 0.5% per attribute level * +10% added damage at maximum level Sadhu 1st Circle required Astral Body Explosion: Knockdown Type: Active * Enemies hit with [Astral Body Explosion] are knocked down * Increases SP consumption by 10% Sadhu 1st Circle required Astral Body Explosion [Magic] - [Psychokinesis] Inflict damage on nearby enemies by separating your soul from your body to cause an explosion. Attacked enemies receive a percentage of Psychokinesis magic damage for 5 seconds. Level 15: Attack: 1506% SP: 227 Type: Magic / Attack Cooldown: 30s Element: 1 / 15 Vashita Siddhi: Confusion Type: Active * Enemies within the range of [Vashita Siddhi] have a chance of being afflicted with [Confusion] for 5 sec * Increases the chance by 10% per attribute level * Increases SP consumption by 20% Lv3 Vashita Siddhi required Vashita Siddhi Decreases the STR, CON, INT, SPR and DEX of enemies nearby. Level 1: STR, CON, INT, SPR, DEX: -5 Consumes 36 SP per second Maximum Duration: 10 seconds SP: 0 Type: Magic / Attack Cooldown: 50s 10 / 10 Possession: Enhance Type: Passive * Increases the damage dealt on an enemy with [Possession] by 0.5% per attribute level * +10% added damage at maximum level Sadhu 2nd Circle required Possession [Magic] - [Psychokinesis] Bind enemy to stop its movement and inflict damage. Level 10: 0.3 second attack 213% Targets: 14 Maximum Duration: 6.5 seconds SP: 141 Type: Magic / Attack Cooldown: 20s Element: 5 / 5 Transmit Prana: STR Type: Active * Allows [Transmit Prana] to also transmit STR Sadhu 3rd Circle required Transmit Prana: CON Type: Active * Allows [Transmit Prana] to also transmit CON Sadhu 3rd Circle required Transmit Prana: SPR Type: Active * Allows [Transmit Prana] to also transmit SPR Sadhu 3rd Circle required Transmit Prana: DEX Type: Active * Allows [Transmit Prana] to also transmit DEX Sadhu 3rd Circle required Transmit Prana Transfer a portion of your INT stat to an ally in front of you. When using magic attacks, deals additional Psychokinesis damage proportional to your magic attack and an extra 150% damage when attacking with Psychokinesis skills. You also receive 50% more damage from Psychokinesis attacks. Level 5: Transmits: 50% INT Duration: 55 seconds Additional Psychokinesis Damage: +0 SP: 90 Type: Magic / Buff Cooldown: 80s |
|
Rank 8
Exorcist |
5 / 5 Rubric: Enhance Type: Passive * Increases the damage dealt on an enemy with [Rubric] by 0.5% per attribute level * +10% added damage at maximum level Requires Exorcist Circle 1 Rubric: Propagate Type: Active * Increases [Rubric]'s targets by 1 per attribute level * Increases SP consumption by 30% Requires Exorcist Circle 2 Rubric: Speed Reading Type: Active * Shortens the attack cycle of [Rubric] by half * Increases SP consumption by 20% Requires Exorcist Circle 2 Rubric [Magic] - [Holy] Read commandments imbued with the power of the Goddesses to deal Holy property damage and reduce the enemy's movement speed. When used against Demon type enemies, the skill deals additional hits and its movement speed reducing effects are amplified. Level 5: Attack per 0.5 sec 639% Targets 5 Max. duration 6 sec SP: 238 Type: Magic / Attack Cooldown: 15s Element: 1 / 5 Engkrateia: Patience Type: Active * Increases the duration of [Engkrateia] by 1 sec per attribute level * Increases SP consumption by 20% Requires Exorcist Circle 2 Engkrateia Exercise your strong restraint by praying to the Goddesses. During the prayer, you receive less damage and become immune to knockback and knockdown. Additional reduction applied to damage received from Demon type enemies. Level 1: Damage taken -5% Duration 3 sec SP: 126 Type: Melee / Buff Cooldown: 30s Element: |
|
Rank 9
Exorcist |
10 / 10 Rubric: Enhance Type: Passive * Increases the damage dealt on an enemy with [Rubric] by 0.5% per attribute level * +10% added damage at maximum level Requires Exorcist Circle 1 Rubric: Propagate Type: Active * Increases [Rubric]'s targets by 1 per attribute level * Increases SP consumption by 30% Requires Exorcist Circle 2 Rubric: Speed Reading Type: Active * Shortens the attack cycle of [Rubric] by half * Increases SP consumption by 20% Requires Exorcist Circle 2 Rubric [Magic] - [Holy] Read commandments imbued with the power of the Goddesses to deal Holy property damage and reduce the enemy's movement speed. When used against Demon type enemies, the skill deals additional hits and its movement speed reducing effects are amplified. Level 10: Attack per 0.5 sec 783% Targets 5 Max. duration 6 sec SP: 378 Type: Magic / Attack Cooldown: 15s Element: 3 / 10 3 Entity: Enhance Type: Passive * Increases the damage dealt on an enemy with [Entity] by 0.5% per attribute level * +10% added damage at maximum level Requires Exorcist Circle 1 Entity: Divine Impact Type: Active * Enhances [Entity] to deal 10% of the original damage to non-concealed enemies * Increases SP consumption by 30% Requires Exorcist Circle 2 Entity [Magic] - [Holy] Make hidden entities nearby reveal themselves with a powerful command. Revealed entities take a designated amount of damage. Level 3: Attack: 1539% Targets 10 SP: 106 Type: Magic / Attack Cooldown: 30s Element: 10 / 10 3 Aqua Benedicta: Enhance Type: Passive * Increases the damage dealt on an enemy with [Aqua Benedicta] by 0.5% per attribute level * +10% added damage at maximum level Requires Exorcist Circle 1 Aqua Benedicta: Last Drop Type: Active * Applies damage to enemies within range of [Aqua Benedicta] for 2.5 sec after the skill's duration ends * Increases SP consumption by 30% Requires Exorcist Circle 2 Aqua Benedicta [Magic] - [Holy] Sprinkle Holy Water on the ground to purify it. Enemies in the purified area receive continuous damage. Flying enemies that don't step on the purified ground are not attacked. Level 10: Attack per 0.4 sec 334% Max. targets 8 Duration 6 sec Consumes Holy Water x1 SP: 220 Type: Magic / Attack Cooldown: 25s Element: 1 / 5 Gregorate: Enhance Type: Passive * Increases the damage dealt on an enemy with [Gregorate] by 0.5% per attribute level * +10% added damage at maximum level Requires Exorcist Circle 2 Gregorate: Louder Type: Active * Increases the no. of status ailments [Gregorate] can cancel by 1 per attribute level * Increases SP consumption by 20% Requires Exorcist Circle 2 Gregorate [Magic] - [Holy] Sends out a wave of divine energy to overthrow the forces of evil. Debuffs of rank 2 and below applied to you or your allies are canceled, and nearby enemies receive Holy property damage. If the skill is applied to a zombie, the zombie is killed. Level 1: Attack 827% Add. damage per debuff 50% Max. 3 debuffs canceled Targets 5 Targets hit 8 SP: 182 Type: Magic / Attack Cooldown: 30s Element: 5 / 5 Koinonia: Sacred Knight Type: Active * Templars within the range of [Koinonia] are considered as Cleric tree characters * Increases SP consumption by 10% Requires Exorcist Circle 2 Koinonia: Enhance Type: Active * Increases the damage dealt on an enemy with [Koinonia] by 0.5% per attribute level * +10% added damage at maximum level Requires Exorcist Circle 2 Koinonia [Magic] - [Holy] Consolidate the faith of your party members into a display of divine energy capable of overthrowing demons. Can only be used when 3 or more members are within range. Additional damage applied when 3 or more of the members are of the Cleric tree. Level 5: Attack per 0.4 sec 202% Duration 20 sec SP: 310 Type: Magic / Attack Cooldown: 40s Element: |
|
Rank 10
Exorcist |
|
Advertisement
 ToS Taiwan
 ToS Reddit
Comments (28)
Once you hit 380, you will move on to Zvgaizde weapons and the new Armor set, your goal is always Primus grade. You can upgrade and transcend them once you find the ones you like the attributes, or you can move on to Raid equipment. Right now, iTOS has only the Masinios weapon (First Refugee raid), but soon you will have others that will come. They are more expensive and demand a little bit of time, but certainly worth it. At a higher difficulty, you have Solmiki (Earth Tower) armor set and Velcoffer armor/weapon too, if you want to consider. Both are expensive (Velcoffer specially) and time consuming.
For skills, there is not a proper combo, but there are skills that can be more worthy together:
- ABE + Katadikazo: ABE will knockdown monsters, allowing you to cast Katadikazo easily
- Divine Stigma + Zaibas, then Possession: This is a multihit combo, good if you have to proc anything (like Masinios Mace extra elemental damage) or achieve a hit count (like some floors at ET)
Besides those two, there is no proper combo, you are free to cast your skills as you like. Sadhu's skills are worth for controlling mob, damage is not the best. The real good combo is making sure that you always have active three buffs: Transmit Prana, Divine Stigma and Aukuras extra Damage, to increase your damage.
Sadhu is completely OK for stuff around rank 4-6 content, but fall late game in usability and damage.
Se quiser utilizar Cleric2, recomendo seguir então Cleric2 Dievdirbys1 Sadhu3 (filler) Exorcist2, assim você pode usar a estátua do Diev para reduzir o cooldown de Transmit Prana e acabar com uma proposta semelhante à Krivis3. Para filler recomendo fortemente Druid1, mas Oracle1, Cleric3, Plague Doctor1, Priest1 ou Kabbalist1 são bons também (em ordem de preferência).
Red: Chapparition for burst or Moa for full time buff. Go all out one or another, no reason to mix them IMO
Blue: Zaura and/or Nuaele, you can mix them if you want, depending on what you lack more, physical or magical defense. Armaos is a cheaper option, but you should have 3 of it to better notice the effect.
Green: Pyroego or Blut. Better go 3 of one or another, to stack 30 extra points on INT or CON.
Purple: Not really impressive options, you can go Yeti for more HP and/or Specter Monarch for SP recovery. You can go with Gazing Golem too, but you have options for knockdown protection on your kit already. Canceril is also an option, but you will need 3 of it to better notice the effect
Eu ainda estou debatendo entre qual Mace usar, mas com certeza você não vai errar com uma Masinios 1-handed Mace, ou com uma Primus Raffye Mace com status de INT e SPR, principalmente. Ainda não cheguei numa definição, mas por enquanto eu sigo com a Primus. Um bom Enhance e alguns níveis de Transcend já te ajudam a pegar um bom MATK.
Equipamentos eu recomendo ir para a linha do Plate, pode ser o básico Primus focando em CON, mas se tiver INT e SPR sempre é bem vindo. Dá pra mixar com Solmiki Cloth pra pegar o primeiro bônus, o resto vai de plate mesmo.
Gemas é gema azul na arma e no escudo, pra dar matk e block. O resto você vê se prefere HP ou DEF, pode ir por preferência. Não acho que gemas de skills possam ser úteis, a não ser que lancem para Exorcist. Por enquanto, as demais é mais a seu gosto mesmo, só olhar o efeito que cada gema dá pra cada peça.
Krivis - Aukuras: Goddess of Fire, Zaibas: Splash, Divine Stigma: Duration e Defeat Evil
Sadhu - Prakriti: HP Recovery, ABE: Knockdown (desliga quando estiver em PT, pq pode desfazer mobs)
Exorcist - Rubric: Propagate e Speed Reading, Entity: Divine Impact, Aqua Benedicta: Last Drop, Engkrateia: Patience.
Sobre os Enhancement: recomendo colocar todos os Enhance das skills de dano no lv. 30 direto, assim que tu pegar elas, pois é barato até esse lv. Como o tempo, depois de ter os outros atributos, coloca todos os Enhance no lv. 50 e, por fim (e essa parte sai cara), começa a subir todos pro 70. Acima disse depende de quanto que Silver vc consegue fazer.
O guia está sendo feito, e vai conter essas informações bem organizadas lá também :)
Uma outra dúvida que me surgiu: Conforme fui testando a build eu senti um pouco de falta do cleric c2. Assim pensei em colocar o cleric c2 e no lugar dos dois ciclos de krivis colocar diev, ja que Laima pode reduzir o cd de prana e outras skills, suprindo, assim, a falta de melstis.
O restante continuaria normal (sadhu c3 e exo c2).
Ficaria assim: cleric c2, diev c2, sadhu c3 e exo c2.
O que você acha?
No mais, é uma alternativa para Krivis, é viável da mesma forma.
Eu já joguei com essa build (Cleric2 Diev1 Sadhu3) e me incomodava muito o fato da estátua, por ter que ser tudo em função dela e do cooldown dela, me senti mais livre com Melestis, além do dano extra que Aukuras com atributo provê. Por isso optei pela troca por Krivis.
Obrigado.
It's worth mentioning that Kabba C3 is very popular now in kTOS because the new boss of the new end game raid (Velcoffer) deals insane ammounts of damage, so Kabba C3 comes in with high Ein Sof + Full Support oriented classes to increase the HP a lot and provide support while taking damage from the boss. M aaybe this support build can be used for both purposes (new raidnd PvP).
Playing Cleric C3, Sadhu C3 and Oracle C1 atm on Level 263 and it works rly well.
Nice to see, that some1 else is interested in Kabbalist and Sadhu combination. Gonna watch this!